Adore Beauty Pty Ltd

Friday, 27 June 2014

How to do a Socket Line eye make up

I love this look it is super classic and goes for any occasion and I mean anything a beach wedding, a night out, a lunch with friends, going to work.  You can make this as natural as you like or add drama by making your crease colour that little bit more defined or keeping it natural and finishing the look with a bright lip.  This is my go to eye make up look when I'm wearing a red lip. It's a two colour look and I'm sure most of you have two neutralish eye shadows?

Here's the finished look...


Firstly you want to prep your eyelids to make sure the make up lasts you really don't want a big crease in your eyelid with this look.  I used the MAC paint pot in Soft Ochre.  You can use a cream shadow or even your concealer lightly over your lids this cancels out any colour and gives a good base.  I'm using the Urban Decay Naked Palette 2 but you could use any shades you have as long as one is light and one is darker.  Sweep your light shade right over the lid into the inner corner and over the brow bone.  I have chosen 'Bootycall' as it has a little bit of shimmer through it but this is also a lovely look with all matt shadows.


Now time to find your crease-think about the brush size you are using...If you have small eyes you will need a small brush go for a tapered brush if you can this is the MAC 217.  Dip your brush directly into the darker shadow (I'm using Tease) so you just have the product right on the tip of the brush, lean your head back and look into the mirror, put your brush into the outer corner end of your crease (not right into the outer corner of your lashline check back on my eye anatomy pic here) then do a little curved wind screen wiper motion with your brush. As well as back and forth do tiny little circles with the brush in the same wiper motion.  Go lightly to start out then you can add more shadow if you want a bit more depth.  Don't go too far in on each side there should be a gap between the end of your crease and the start of your lash line as this is what keeps your eye looking wide awake and open.  You could also use a smaller brush with an even darker shadow if you want it more precise.  Then, as always, keep on blending in the same motion until you are happy with it.


This look generally needs some lashline definition to make it really work. You can either do that with a matt black shadow on an angled brush to really push and smudge into the lashline or go for a full on gel liner (I'm using MAC Blacktrack) but the L'oreal and Maybelline Gel liner is also good.  For a really precise winged liner to finish this look off follow the steps detailed in my winged liner lesson here. I also like to add a kohl liner to the upper water line (this is underneath your lashline) as it's keeps everything nice and dark and defined...this may take practice!  Add lashings of mascara to curled lashes and you are good to go.


Don't forget the rest of your face...what would you like to see on the blog next ladies? Skin, Lips, Brows, Contour ???

{More on how to do your own make up...}


or if you are Melbourne based and would like to book and one on one lesson or special occasion make over read more about my make up services here

{shop the look}


Wednesday, 25 June 2014

Storyboard- When Vintage Becomes Modern

This beautiful wedding didn't just take inspiration from times gone by it took vintage and made it shiny, modern and gorgeous.  The bride wore her mums redesigned 1979 lace dress, had her grandmothers pearls incorporated into her headpiece and was proposed to with her fiancĂ©es grandmothers engagement ring.  The purple and cornflower blue flowers provided a burst of colour and freshness and even the Scottush rain didn't stop them getting outside to the castle grounds.  This is a wedding made with memories and love x

Read the full story of Louise's wedding dress by Amy Hughes on www.brawbrides.com.


Images by http://greenweddingphotography.co.uk


Thursday, 19 June 2014

Get your SPF sorted!!


Sorry, didn't mean to sound bossy (well sort of) so here in Sunny Scotland we have had four days straight of good weather including actual proper sunshine!!  

Are you using sunscreen?

This is my facial sunscreen of choice I always use SPF 50+ on my face when I am going to be in the sun yes this generally means my face is lighter than my body but I would prefer this than a wrinkled face and not to mention age spots (which by the way doesn't only happen to older ladies we can all be susceptible).  A little bit of colour makes us all feel better but please protect your skin.  You can always use a bronzer to even up your colour.  

A quick rundown on the Soap and Glory Sunshield Superfluid, it cost me £15 from good old Boots, you can wear it under make up well provided you keep the application light.  Too much of the sunscreen is going to make your face slip.  The texture is very light and sheer for an SPF. 

I apply from the very top of my forehead downwards covering the areas most likely to pick up the sun first that way I know those areas are protected eg, forehead, nose, tops of cheekbones then I work the rest of the product over the rest of my face.  It gives a nice dewy finish once the make up is on top and it keeps the shiny red and flakey noses at bay!! If you really don't like a dewy finish apply powder over the top of your foundation to keep things looking a bit more matt.


Tuesday, 17 June 2014

Storyboard- Effortless Elegance


With floral blooms and damask backdrops, this wedding is all about class.  Soft vintage pink roses accessorised with classic pearls made up the beautiful bouquet and adorned the pink & ivory three tier cake.  A soft muted colour palette with just the right amount of bling in the brides shoes.  The elegance is effortless in this beautiful wedding day and lets the romance shine through. 

Saturday, 7 June 2014

Destination weddings are fun...

I jumped at the chance to head back to Pitlochry where my hubbie and I enjoyed our gorgeous log cabin honeymoon some 5 years ago.  Nicola who I had done bridesmaid make up for at Suzi's wedding back in 2011 had planned her wedding for the beautiful Atholl Palace so we packed up our weekend bags and headed to one of the most gorgeous parts of the country I have seen in a while. The Bluebell fields were astounding.


We stayed at the lovely Riverwood in Strathtay ran by Alf & Anne the food was amazing (Anne has earned her cooking stripes at the Nick Nairn School of Cookery), the decor was divine and the peace and quiet was just heavenly...I fell asleep to the calming sounds of the River Tay.  I highly recommend a visit here our room was serene with plush linens and driftwood furniture...I actually could have moved in.  We even had a little red squirrel join us out on the lawn while we had breakfast.  After Nicola's wedding Gary and I enjoyed a bottle of bubbles river side the sun was shining and the view was glorious.
Pre-wedding breakfast was yummy I also had pancakes and crispy bacon but was too busy eating to take a picture!


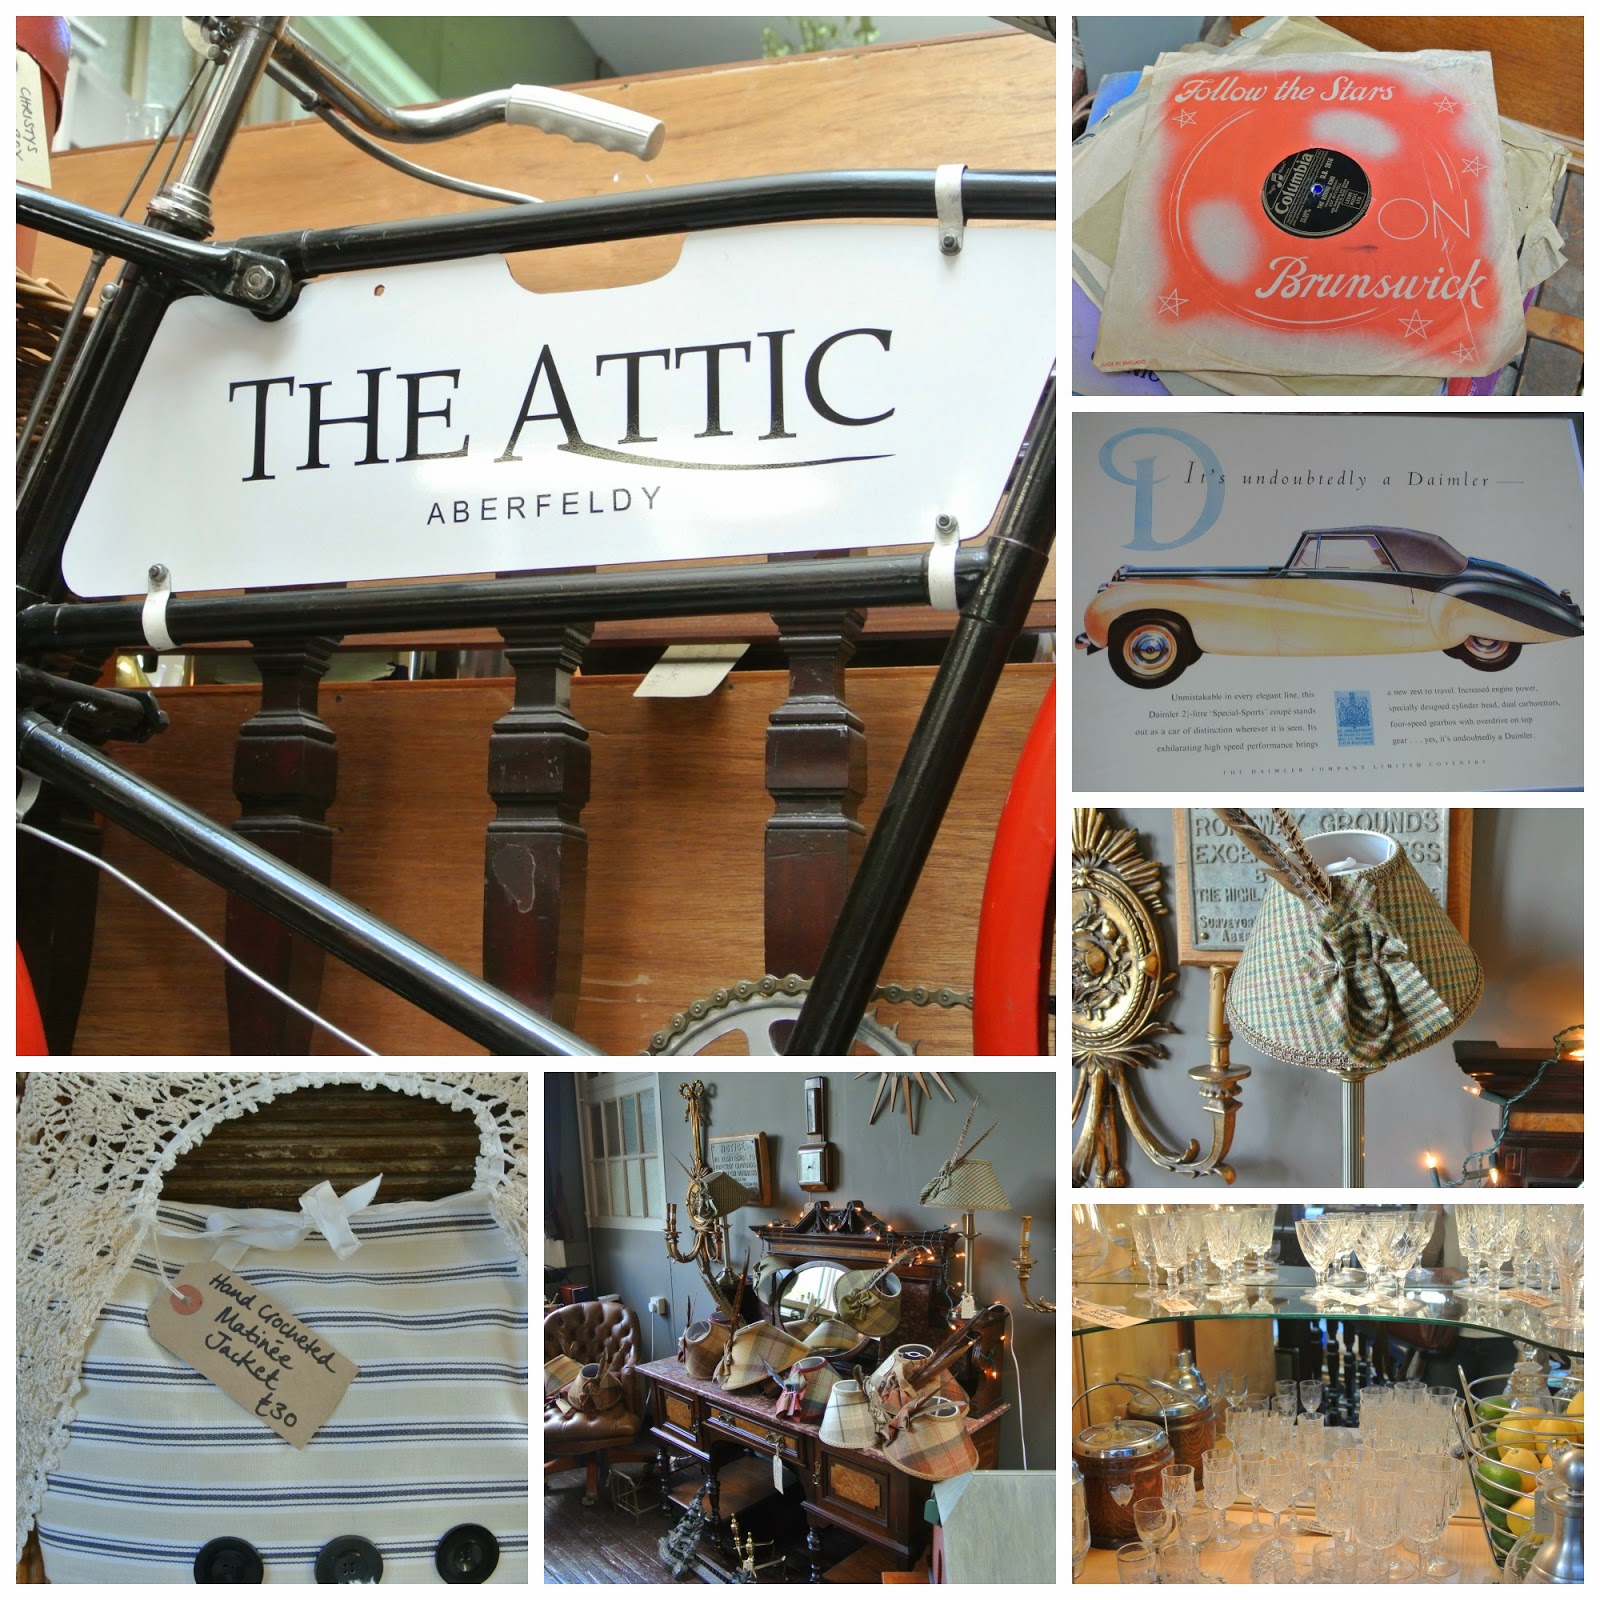
We decided to go a bit further a field and headed off to Aberfeldy for a look around and it was gorgeous!  First we popped into a minefield of gorgeous old and vintage items all clustered around the balcony level of one of the high street shops.  The Attic was such an interesting shop to have a nosey around I loved the mis-match collection of peices there was just so much to look at I could have spent an afternoon in there.  So much history in one place...my favourite was the bureau full of vintage glass wear.


We nipped into Homer at the Watermill where I fell in love with just about everything.  I particularly loved the big pieces of vintage furniture but Gary quickly steered me towards the lovely fairtrade and somewhat slightly daintier mementos.  I found a gorgeous letter 'H' tag stamped on wood with a leather tie perfect for our key rack.  I could have bought the shop.  I also loved their motto "Make the everyday beautiful".


Back into the car we drove a bit further a long to Kenmore.  The views were amazing.  We spent quite some time on this beach with our two wee dogs when we were here for honeymoon and Gary spent a bit of his childhood weekends in Kenmore so we felt quite at home here.

Across the bridge and a small walk over to The Mains of Taymouth and we came accross another wedding party.  This really would be a beautiful place to get married...we didn't want to seem too 'wedding crasherish' so took a few snaps and headed back to the car! 


 Last stop we had a wander through the gates of Taymouth Castle...looking for a castle which we didn't actually find in the end but we saw some beautiful scenery! The Taymouth Marina is also definitely worth a visit and again some fab photo opportunities.


If you haven't been up this neck of the woods for a while or you are looking for somewhere for a weekender or even a gorgeous place to get married Perthshire has a lot to offer xx


Sunday, 1 June 2014

Introducing 'storyboard'

I'm introducing a new feature to the MOL blog called storyboard...we are so privileged to get an insider peek into our beautiful brides wedding days and not only do we love wedding hair & make up we love every little wedding detail.  We hope you enjoy and are inspired.


"Our Promise" 

Becky is radiating all things youthful and fresh. Just like the wilderness around her her skin is radient and a fresh pink lip compliments her spring bouquet beautifully. With purple & soft parmaviolet hues this colour scheme is picked up in the grooms shirt and cravat it's gentle yet impactful. The bride's classic lace trim veil frames her delicately jewelled gown beautifully as does the spring backdrop.

Photography by AT-Photo Ltd Wedding Photography
Ax


Wednesday, 28 May 2014

How to do winged eyeliner ~ gel liner.

Winged eyeliner...it's one of those things that can be soo right but can go soo wrong, it could easily make you late for work or a night out you could literally spend a good half hour trying to 'even' those flicks out.  Let me tell you now the face is not symmetrical so trust me if you are trying to get those flicks perfectly symmetrical you should just give up now! 

Here's my 'how to' for an easy winged out look there's special 'item' that makes this so super easy but I'm not going to mention it yet you will need to read on to find out.  I've paired mine with a classic red lip, fail safe classic look...I love it.  My liner of choice for this technique is L'oreal gel intenza.


Firstly as this is a look that is pretty light on the eyeshadow (therefore minimal fall out) I have gone ahead and done my  base first (I used L'Oreal True Match applied in a buffing motion with my Real Techniques Contour Brush).  Don't bother with under eye concealer just yet.  So first up you want to prep the eye you can use a primer or just run your foundation brush over your eyelids followed by a sweep of your powder.  Add a contour colour into the socket of your eyelid, use a taupe or light greyish shadow into the crease, this adds depth to your eye and is a nice frame for your liner.  If you are using a particularly wet liner this can also help stop the liner transferring onto your lid. 


So what's going to make this look so easy for you! Fanfare please....sellotape! It's going to keep the flick nice and clean and sharp.  Take two short strips and stick it to the back of your hand a few times.  Stick the tape at an angle that follows your lower lash line upward towards the tail of your brow.  Once you are used to doing liner you will be able to do it freehand and this would be the imaginary line you would be drawing.


With your gel liner dip a fine liner brush into the pot and go ahead and draw your wing it doesn't matter too much if you are a bit messy and go over the tape but you do need to keep it tidy on the inner edge.  Once you've done the wing use your long edge of the brush to line the lash line.  How thin you go depends on your eye shape I generally keep it quite thin and leave the inner corner liner free this gives the eye an open look.  If I wanted something more feline I would go ahead and line right into the tear duct. Then go ahead and lift your eyelid up gently and coat the underneath of the top lashline.  This keeps it all nice and black with no skin peeking through. Pull the tape off from the bottom inner corner upwards and outwards towards the brow. 


So you have your liner!   Now for a few finishing touches.  I always 'set' my liner by pushing a matt black shadow over the the gel liner using an angled brush. It keeps it in place and adds to the intensity.  If you want to to can also connect the wing on the lower lash line.  To do this you would use the same black eyeshadow and push it from the wing close to the lower lashes (you can chose how far along you'd like this to go)  Next, apply your concealer (if you do this step first the tape will take the concealer with it) add mascara upper and lower, an extra sweep of blush and you and your reasonably perfect liner are out of here!


Let me know if this works for you ladies! Comment and tell me what eye makeup technique  you would like next x
{More on how to do your own make up...}


or if you are Melbourne based and would like to book and one on one lesson or special occasion make over read more about my make up services here

{You can buy all the products I used here}
*contains affiliate links*
L'oreal gel intenza
Real Techniques Core Collection
Real Techniques Starter Brushes
Napoleon Colour Disc (Trench Coat)
Fine Liner Brush 


Wednesday, 21 May 2014

How to cope with nerves...

Being nervous about a big event in your life is natural whether it's your wedding, a big life change or an important project at work.  Nerves are usually part in parcel of the process. On the run up to my wedding I was definitely nervous or at least 'on alert' I would wake up in the middle of the night thinking about all sorts of possible outcomes, the good and the bad.  In fact when ever something 'big' is going in for me it's my sleep that suffers.  
Here's a few tips that I find help me:

Image Source
Positive Visualisation- on the run up to the wedding I thought about it a lot I wasn't just nervous about it I was also excited.  I was most worried about walking down the aisle all my friends and family turning round and all eyes on me.  That's approximately 200+ eyes when you break it down...no pressure!  When I was having a 'moment' which for me was usually in the middle of the night I would spend some time making myself visualise the walk down the aisle and seeing it happen and be a success.  I made it vivid and real in my head, it was a full colour movie of me in my dress, arm in arm with my dad, I could hear my entrance song (Damien Rice's Hornblowers Daughter, if you're interested) I could see the happy faces of each person as I walked past each row, I could feel the happiness and I could see the smile on my fiances face when I got to him at the end.  For me it really worked.  I figured if I was spending the time and energy on thinking anyway I may as well make it positive thoughts.  Sometimes I even used it as a way to get to sleep at night. You really can't under estimate positive thinking it really works.  When you feel the negative ones creeping in stop take a breath and work on making them positive.

Notepad and Pen- why is it when the lights are off and all is quiet your brain gets a supercharge of thoughts and the little niggly things pop right into your grey matter and they shine so bright you just lie there mulling it all over in your head?? It's an oldie but a goodie keeping a notepad and pen next to the bed is a good idea.  Jot down those thoughts and release them from the confines of your poor brain.  Take the paper option though as picking up your phone or iPad to write a note is probably going to wake you up more. Especially if you've got Facebook notifications,  15 new emails and a couple of what's apps requiring attention.  The act of scribbling down your thoughts is cathartic which then hopefully means you can get some shut eye.

Smiling Mind App- hard time shutting off? I like to use this guided meditation to help me clear my mind. Keep your headphones next to the bed and pop it on when you really need some help quieting your thoughts.  I like the 5 minute bodyscan and although meditation is not meant to be about sleep I do find it a good tool to actively focus on my body so my brain is way too busy to have all the other thoughts.  It can take practice but is handy to have and you could even do it on the train to work or at lunchtime in your car.

Image Source

Lavender pillow spray- I love a spritz of the L'Occitane Lavendar pillow spray or make your own Linen Spray there a great how to over on the 'One Good Thing' blog.  I just love the scent it seems to have an instant calming effect and when I pair it with one of the other methods here it usually helps me on my way.


Getting up for a while to take my mind of it- if all of the above doesn't work I usually get up for a while and do something else...read my book, do some pinning on Pinterest, once I feel I might have satisfied the itch I head back to bed and hope for the best! Try to keep it to about an hour maximum tell yourself 'back to bed by 5am' otherwise you will end up a very tired person if your body clock resets itself to 4am.  

Voice it- during the waking hours try to talk about what's going on in your head with your partner or loved ones. The act of saying something out loud alone can sometimes make you feel so much better. It may be something that seems massive in your head but as soon as you say it out loud it might just not seem as bad.  Whatever's going on for you it's very unlikely that you have to deal with it alone. Get talking and don't forget things that cause a magnitude of worry in the middle of the night are usually much more of a minor problem in the morning. 


Whatever's going on for you I hope you find these tips helpful.  Even if you're  getting your full 8 hours of beauty sleep a night I'm sure there's plenty of opportunity to actively make more positive thoughts in your life or to take out 5 minutes of your day for some recharging and refocusing and most of all some well deserved shut eye!

Thursday, 15 May 2014

How to do your own make up~ Smokey Eyes


So in the last  lesson we touched on each of the three main eye make up types and the anatomy of the eye (here) if you need to reference back to the diagram at any point.  The most requested eye make up by far is the smokey eye.  This is a wearable reasonably subtle smokey eye I have chosen plum and gold as my two colours. ~Note smokey eye is technique not colour so it can be very natural to very dramatic.


First up we need to prep the mobile lid which means add a primer I'm using a MAC Paint Pot in 'Painterly' or you could use a dab of concealer or foundation blended well over the lid this is what give your eye make up staying power and stops creasing, a sweep of face powder over that will aid blending and make it even better in stopping creases.

Next we add a colour base so choose something that will work with the colours you have chosen this is Maybelline Colour Tattoo in Metallic Pomegranate this is your secret weapon in doing a successful smokey eye.  Blend the colour base all over the eye but not too far up you don't want to go too far over the crease.  These little pots make the smokey eye more intense and there's loads of them out their regardless of the brand they all do the same job: add depth of colour and give something for the eyeshadow to stick to. Follow the links to my favourites from MaybellineMACBenefit and Smashbox.


Time to add your first eyeshadow colour I chose a matt texture plum shade and patted it all over the colour base keeping below the crease and then lightly added the same colour to the lower lash line (just with what was left on the brush not adding any further product).  You can keep adding the first colour until you get the intensity you want.  Don't worry about neatness at this stage as you will be blending more and cleaning up under the eye.


In we go with colour 2 I have chosen half baked from the naked palette as I wanted to warm up the colour and graduate upwards towards my brow bone.  I push the colour right into the crease at the outer corner and blend forward and backward over the crease (windscreen wiper) and also do tiny circular motions with the brush in the same back and forth motions.  If you are adding more product be sure to push the colour into the crease at the outer corner and work in towards the inner crease this way the majority of product in deposited on the outer corner.


TOP TIP:  I like to add an 'anchor' to my eye make up it is either the bronzer I will be using later on or the face powder I will use for contouring or sometimes even the blush I plan on using.  I like to sweep a little bit of that over colour 2 through the crease in the same motion but ever so lightly.  I just feel this 'anchors' the other colours and ties it into the rest of my face.  

I also intensify the darker colour on the lower lashline (usually about 2 thirds of the way across) and then add the lighter colour to the tear duct and across to meet the darker colour.  I also highlight my browbone either with the light colour or a matt bone shade shadow.  I will come back to eyeshadow textures in a later lesson.  


Curl your lashes and add mascara and a liner if you want to.  Now is a good time to stand back and re-assess.  You can go back in and add more if you want as maybe your blending came too far down and you need to pat more colour 1 over the shadows to intensify it or maybe you need to even out the shape on top by bringing your browbone highlight down slightly.  Maybe you just need to blend more.  Blend blend blend it will only make it look better.


Once you are happy with your eye make up clean up all the mess under the eye with a babywipe or gentle eyemake up remover, add the rest of your face and off you go.  As Kirsty and I were off out on a MOL date last night I decided to add a little extra drama with a darker brown shadow through the crease (MAC's cork) and a set of half lashes. That's the beauty of a smokey eye once you master the technique you can make it as dramatic or as natural as you like.


I hope this has helped you master the smokey eye if you have any questions please leave a comment below or straight to the Facebook page and I'll do my best to answer your query x


{More on how to do your own make up...}


or if you are Melbourne based and would like to book and one on one lesson or special occasion make over read more about my make up services here


Wednesday, 7 May 2014

Intro to doing your eye make up and why I do eyes first.

If you have ever had your make up done by me you know I do eyes first.  I usually a warn my clients this is how I do it but if I don't I usually hear a paniced voice asking "Am I getting foundation??" The cleanest way of doing make up up is by doing your eyes first that way if there is fallout (i.e. eyeshadow dropping down on to your face) the rest of your face can be cleaned up easily and not have eye make up smeared all over your base. It may look weird when you are doing it but it just saves time and makes for a cleaner therefore better finish.    One thing I will say is if you are using all natural colours (so nothing too dark and smokey) or even using cream eyeshadow products (that don't have fall out) you should be fine to do our base first.  I would still leave under eye concealer to the very end so you can still do a bit of a clean up.  So lets get down to it...


{the eye anatomy}

If you are going to following any of my how to's (or anyone else's for that matter) you need to 'get' the anatomy of the eye (so you know where you are putting what). 


The brow bone is the highest part of your eye directly under your eyebrow this is a great place to use a highlighter which makes the arch of your brow more defined which helps to frame your face.

The socket or crease is the line where your eyelid folds over your eyeball some people don't have much of a crease at all and this is a flat area, some people have hooded eyes so the crease folds away into nothingness and some people have a natural enviable crease that gives them an effortless chicness when they work it right... think Audrey Hepburn.


The outer corner or outer V is literally horizontal V shape at the end of your lashline into the start of your socket line this is where you put your outer corner definition when doing a classic eye.


The mobile lid is the part of your eye that moves when you blink i.e. your eyelid.  This is likely where you usually put most of your eye shadow at the moment then wonder why you can't see it when you open your eyes.


The lashline.  We have two upper and lower.


The inner Corner/tear duct is the smaller horizontal V shape pointing in towards the eye. Great for adding highlight to make you look more awake or make close set eyes look wider apart.


*Thanks to my beautiful model Brogan *
  
{the three main 3 looks}

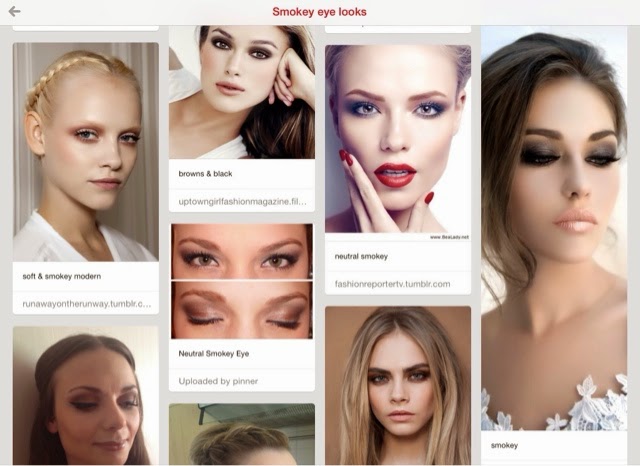
The thing I get asked most is how to do eyes or people tell me they just can't do eyes.  In all honesty I think eye make up is probably easier than doing a lot of other things in make up for example expert contouring or a really defined bright lip. In my opinion there's a 3 main kinds of eye make up techniques and I have put together some Pinterest boards for you to follow which better displays them.  


Smokey Eye: this is probably the most mistaken eye makeup some people think this is a colour as opposed to a technique a smokey eye can come in any colour and it's basically using two colours that graduate upwards toward the brow.   Possibly the easiest eye make up to master (honest!) provided you can blend or have a lovely brush to assist you in the process.


 Have a look at the smokey eye looks here .

Classic Eye: this is a eye technique with one main colour all over the eye that then has outer corner definition in a darker colour, this is the eyemake up look I think most people are aiming for when they ask for a smokey eye.  Great for a feline eyeshape and acccessoried beautifully with a elongated flick of liner. 


Check out my classic eye examples here.

Socketline/Crease: think old hollywood eyes.  Here the eye crease is defined in a darker colour which adds depth to the eyes and usually suits a rounder doe eye type look and tyically paired with a thick statement liner and lashes. 


Research the socketline look here.

~edit.  Since I wrote this post there has been a few popular additions in make up namely halo eyes & cut crease I like them both but both are slightly trickier to do on yourself but I will hopefully come back to add these as how to's soon.  If you really want to see them give me a yell on the comments below.


{More on how to do your own make up...}


or if you are Melbourne based and would like to book and one on one lesson or special occasion make over read more about my make up services here


Friday, 25 April 2014

Using your fingers to apply make up.

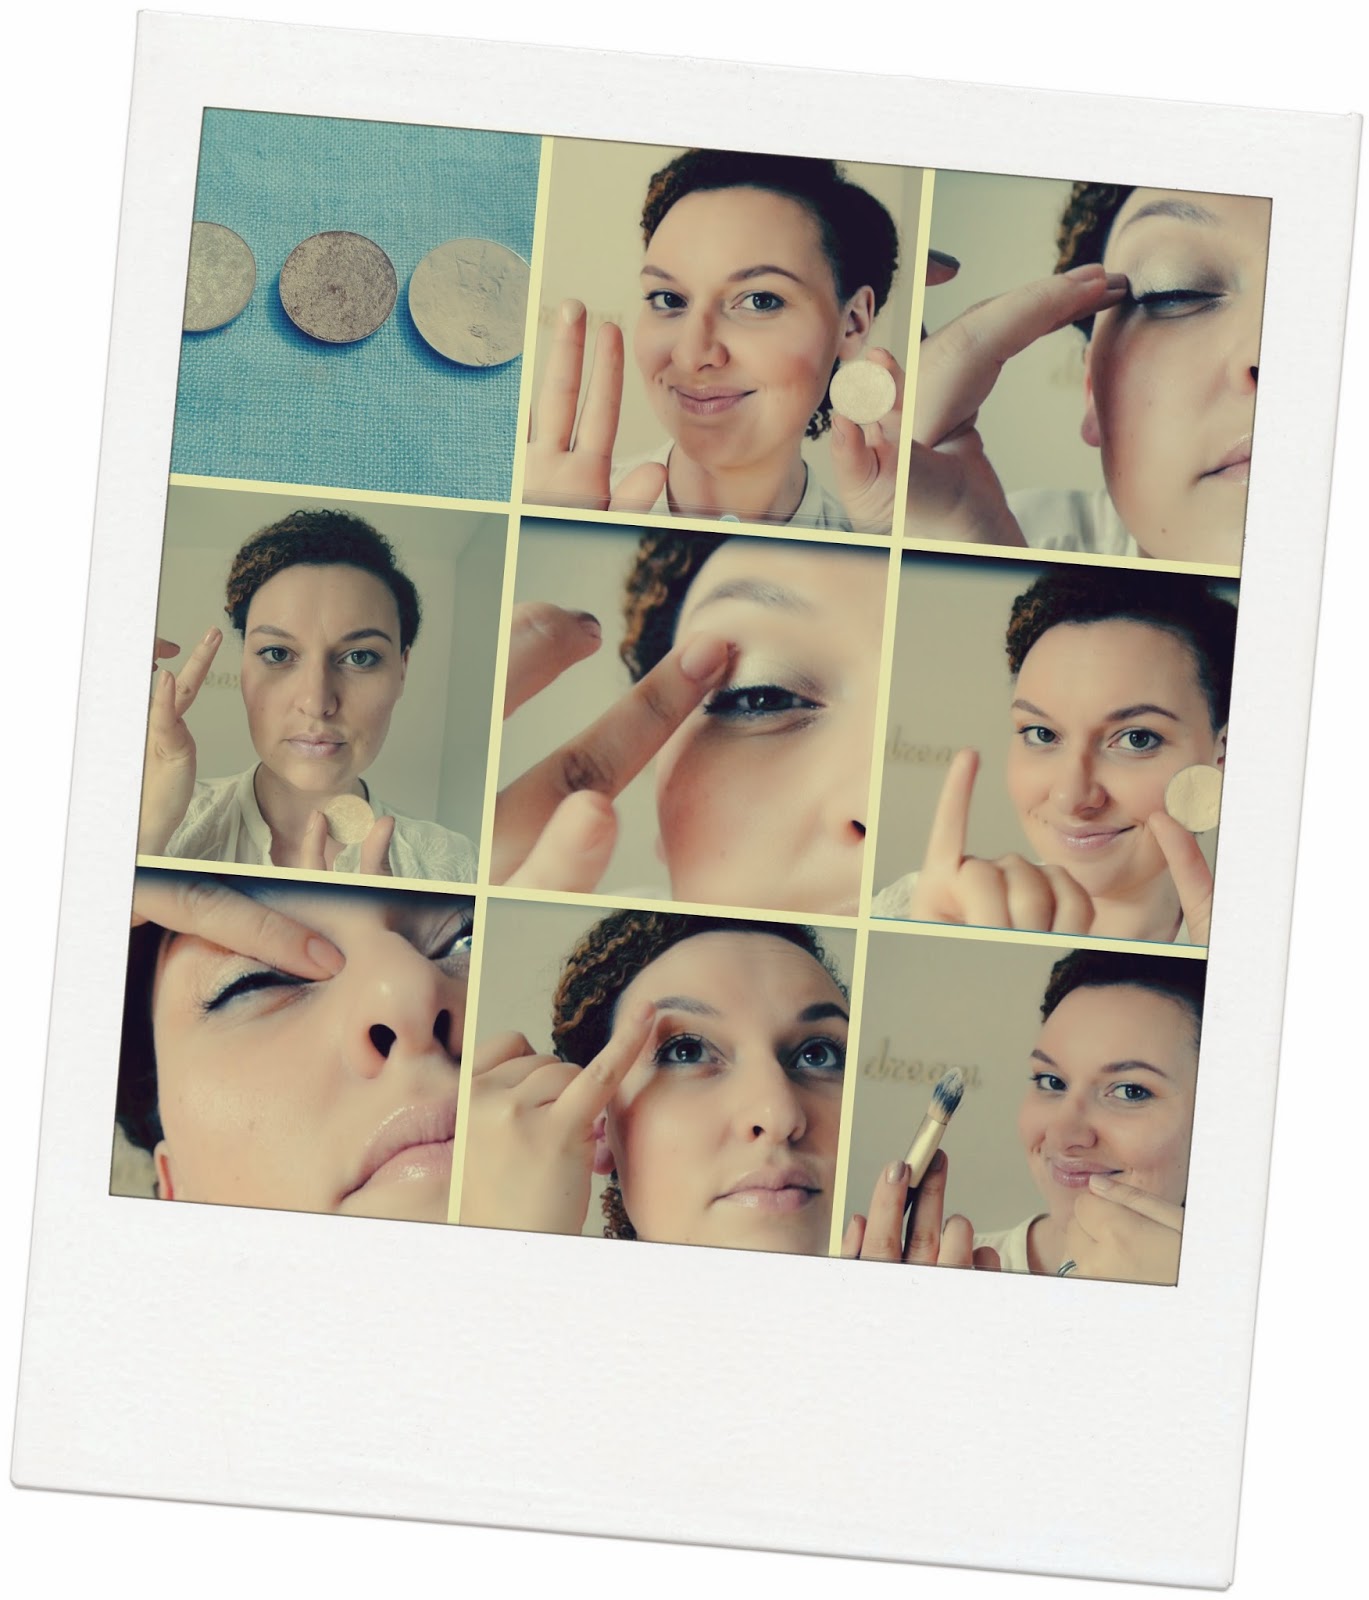
As we discussed in the last lesson, catch up here , a set of brushes is going to make things a whole lot easier for you when it comes to make up however I think your fingers are an invaluable tool in make up application.  I remember when my friend was pregnant I took her into MAC for a treat to get her make up done and the makeup artist thought is was actual blasphemy when she said sometimes she used her fingers for applying her make up...really?  Maybe it's because I don't have to sell brushes as part of my job but personally I think provided they are clean and you use them in the right manner go for it I say.  Here's my best finger tips...


  • Use your left hand for your left eye and your right hand for your right eye. Why? The orientation of your finger tips works best this way and blending should go from inner corner towards outer corner
  • Use your ring or middle finger for applying eye shadow all over the lid in a patting and then swiping motion 
  • Press the pad of the ring finger in a darker shadow and apply this right into the crease and outwards and down into the outer corner and the same back up again
  • For inner corner highlight press your little finger into a lighter shade starting at the inner corner sweep slightly up into your crease and then the same on your brow bone
  • A note on textures- as I used two shimmery shades here I used a matt texture as my highlight


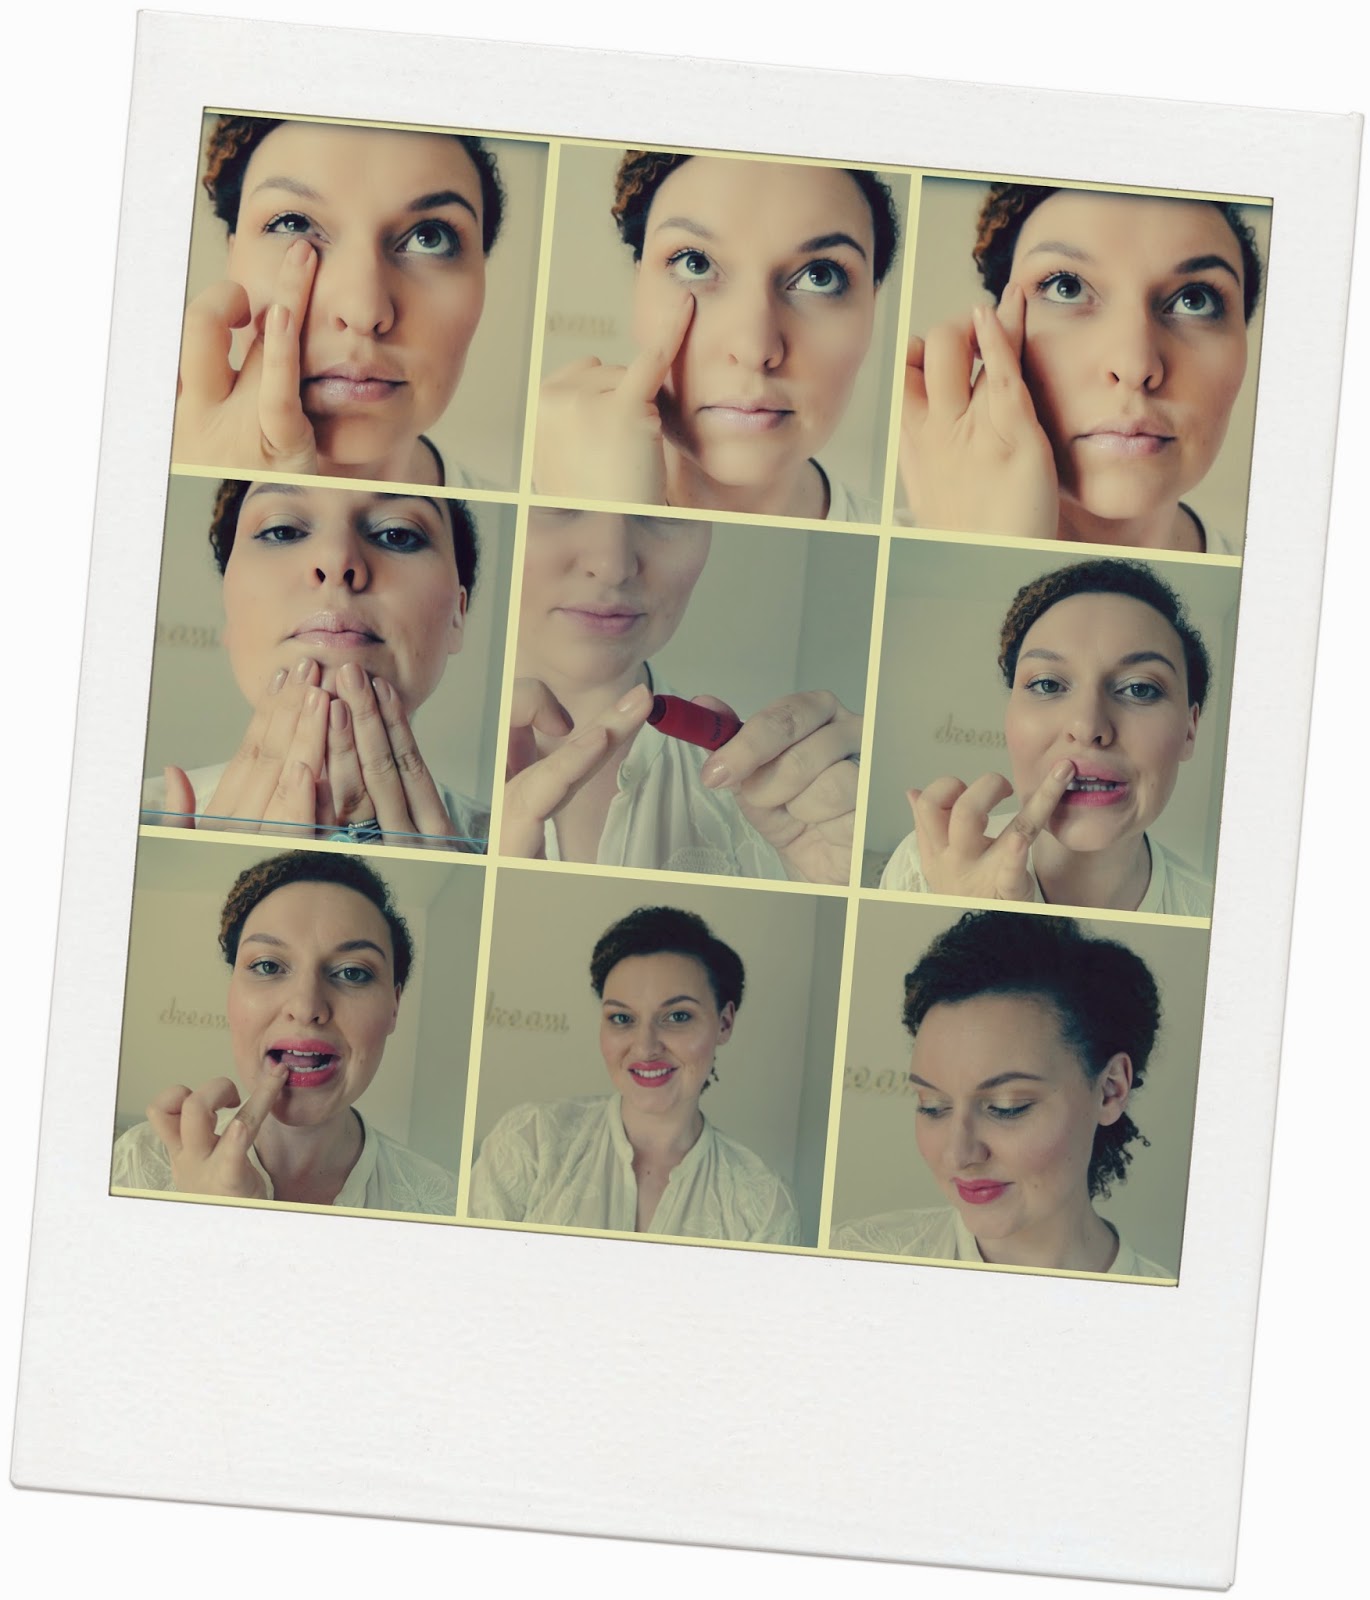
  • Feel free to apply your foundation with your fingers (I prefer a brush this one is Boots No7 Foundation brush)
  • Pat and press your foundation into your skin to 'mold' your foundation into your skin (this makes sure you're not left with brush marks)
  • Using your ring finger pat pat pat your concealer under your eye along and up the outer corner of your eye and down towards the outer corner of your mouth
  • Use your fingers to pat a cream blush up over the cheekbone.  If you dont have cream blush maybe you could use your lipstick (think multi-use people!)
  • Add a sweep of your lighter shimmery eyeshadow over the top of the blush to act as a highlight
  • Press your middle finger into a bright lipstick and dab and work into the lips to create a stain finish up with a dab of lip balm.
So it's likely this won't be your special occasion face but it could be your go to the park with the kids face, meet the girls for coffee face or your 'oh my god i'm so late but I won't scare anyone' face...  It's pretty much my go to face and I hope it works for you!

{More on how to do your own make up...}


or if you are Melbourne based and would like to book and one on one lesson or special occasion make over read more about my make up services here

Wednesday, 23 April 2014

Do not disturb...make up lesson in progress...


I had the pleasure of spending a morning with my good friend Lynne and her lovely mum Norma to do a make up bag review and a make up lesson.  We had identified a few things the ladies wanted to work on before the lesson for Lynne it was mastering an eye make up look and creating something herself that she could wear day and night.  Norma wanted to really go through her make up collection and decide what was maybe no longer age appropriate or what would and wouldn't work for her.  How brave are these ladies make up free and about to dive into their first lesson!


We started off doing the clear out and wow what a collection of make up these ladies have but both said admittedly they had hardly ever used it.   We were ruthless we got rid of anything that was too old, the wrong shade, that didn't work the way we wanted it to or that I didn't think would work for them.  Here are the rejects...

It's a good idea to do this if you have a make up bag full of products you don't use or don't know how to use.  Embrace the spring clean feeling and get rid of it!  It's only taking up space and breeding bacteria!  Rummaging through old and unused products will just slow you down a clean kit of products you can rely on is the way to go.  We did of course find the good and the bad.  Norma had the perfect neutral palette of warm browns that complement her eye, skintone and hair colour perfectly.  Lynne had her go to primer and foundation that works a treat for her.  It's about finding what works for you and adding in products and tools that make your routine easier & better.


Getting down to business...after we filtered through the vast collection of make up the ladies had I picked out what I thought they should be using as their staple products between that and the goodies I brought along there was plenty to get started with.  We did a combination of demonstration and DIY techniques and both ladies finished a complete look on themselves.  I filled out a face chart (shopping list!) for both detailing products that I think would work for them both. 

Here's my lovely ladies with their completed looks...


Lynne said "I absolutely loved my lesson, learned loads and opened my eyes to doing things in a better way.   I'm no longer terrified to explore the make up section in Boots!!  I used to have a straight in straight out approach or stand staring blankly at the shelves hoping for the right product to leap into my basket. Now I'm happy to wander round and try things because I know what to look for. Amy's lesson was informative and fun. I would recommend the lesson to anyone who knows they need some make up help and for people who want to be excited by make up again!"

Norm said "I really enjoyed the lesson and learned a lot.I had a good overhaul of make up collection which was what I wanted.I found the whole experience enjoyable and enlightening. Friendly approach with honest comments given. Not rushed and relaxed. Lots of information and advice given regarding brushes and foundation and eye make up"

I had a lovely time with Lynne and Norma and we probably could have talked about make up all afternoon it really is a minefield.  Make up to me has always been something I was comfortable with, yes, I haven't always got it right but I have never been scared of experimenting and trying new things.  If it doesn't come quite as easily to you or you want to overhaul your make up bag get in touch with me.  I'm not saying one lesson will teach you everything you might ever need when it comes to make up but it might get you thinking differently about things, push you slightly out your comfort zone were you might be keen to experiment and let you know whatever you are doing isn't wrong there might just be different or even better ways to do it!

Don't forget to follow my DIY series #molmakeuplesson (links below) which is a weekly series to teach you the basic steps in make up and give you some tip offs on tools and products along the way.  Feel free to comment and ask questions if you have any.

*Thanks to Lynne & Norma for being my make up lesson guinea pigs, completing the pre & post lesson homework and giving me honest feedback don't forget that this is a process and getting comfortable doing your make up probably isn't instantaneous but enjoy the practice and don't be afraid and i'm never far away if you need some help!* 

follow the links for....