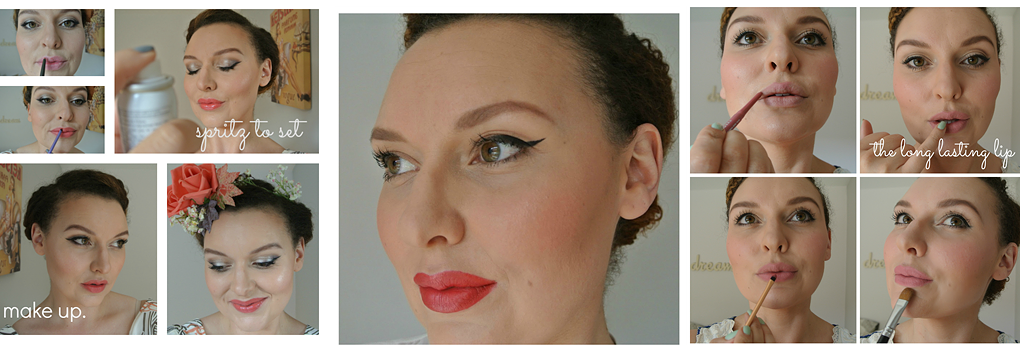
Here's the finished look...

Firstly you want to prep your eyelids to make sure the make up lasts you really don't want a big crease in your eyelid with this look. I used the MAC paint pot in Soft Ochre. You can use a cream shadow or even your concealer lightly over your lids this cancels out any colour and gives a good base. I'm using the Urban Decay Naked Palette 2 but you could use any shades you have as long as one is light and one is darker. Sweep your light shade right over the lid into the inner corner and over the brow bone. I have chosen 'Bootycall' as it has a little bit of shimmer through it but this is also a lovely look with all matt shadows.


This look generally needs some lashline definition to make it really work. You can either do that with a matt black shadow on an angled brush to really push and smudge into the lashline or go for a full on gel liner (I'm using MAC Blacktrack) but the L'oreal and Maybelline Gel liner is also good. For a really precise winged liner to finish this look off follow the steps detailed in my winged liner lesson here. I also like to add a kohl liner to the upper water line (this is underneath your lashline) as it's keeps everything nice and dark and defined...this may take practice! Add lashings of mascara to curled lashes and you are good to go.

Don't forget the rest of your face...what would you like to see on the blog next ladies? Skin, Lips, Brows, Contour ???
{More on how to do your own make up...}
The Make up brushes you NEED
Using your fingers to apply your make up
Intro to doing your eye make up and why I do eyes first.
How to do a smokey eye.
Mastering Winged Eyeliner- Gel Liner
Using your fingers to apply your make up
Intro to doing your eye make up and why I do eyes first.
How to do a smokey eye.
Mastering Winged Eyeliner- Gel Liner
or if you are Melbourne based and would like to book and one on one lesson or special occasion make over read more about my make up services here.
{shop the look}