Adore Beauty Pty Ltd
Showing posts with label contour. Show all posts

Monday, 27 October 2014

Simple contouring with powder


Soooo contouring then? I always get asked about this as if contouring is a new and crazy difficult make up technique but it's really not it it's been part of a make up artist techniques for years plus can be simple, quick and incorporated into your daily make up routine (if you want to).  I do it most days and it's really not complicated and really is just strategic placement of bronzer. If you want to read more in detail about it see here and here

Here's my easy peasy technique:
1. Choose a matt bronzer this is the Rimmel Natural Bronzer (which has some slight shimmer)other good options are Benefit Hoola, Bourjois Delice de Soleil Bronzing powder I love this tapered blusher brush by Eco tools for this task
2. Make your first sweep under the cheekbones (from the top of the ear at an angle going toward the corner of the mouth but stopping about 1 or 2 inches from the mouth)
3. Go under the jawline (you can also bring this down the decleotage)
4. Sweep down the sides of your nose and lightly under the tip of your nose
5. Optional extra- the upper corners of your forehead
6. Go over each area again adding a little bit more product if you need it.


Voila easy peasy contouring...

.

Friday, 1 August 2014

Revisiting contouring

My first post about contouring was quite some time ago and if your a beauty follower on blogs, Pinterest or Facebook you've probably seen the Kim Kardashian crazy contouring picture that floats around after a tweet of her 'mid contour'.  With an influx of information in the beauty world about contouring these are quite easy to do guidelines to try it out.

Have you ever had your make up done and felt like you've been given the 10 years younger treatment? Likelihood is that you've had some contouring incorporated into your make over. Mastering the art of contouring is no easy task but can make you look and feel great. Contouring is about light and shade and using make up products to either bring out (using a light shade) or push back (using a darker shade) areas of the face.

Follow these simple contouring rules:
1. Only ever attempt contouring in a well lit area.
2. The 'perfect' face shape is oval and that's what you are aiming for so use a darker product (you can use either powder or foundation) around the outside of the face to 'blank out' outer areas (e.g. top corners near hairline, corners of the jaw) aim for a diamond shape in the centre of the face. This pushes back these outer areas into the shade making your face appear more oval.
3. Adjacent to these darkened areas use a lighter product to bring out the new face shape you have created.
4. BLEND. Single most important thing in contouring...well actually in make up application full stop. Regardless of what product you have used you must blend these harsh lines or you will get some serious funny looks! Be brave and use a good amount of product don't go too faint or you've likely wasted your time but don't forget to blend like you've never blended before!
5. Use contouring to emphasis your cheekbones by sweeping your darker colour down underneath your cheekbones (do the fish face and suck in your cheeks to see where this colour should go), use your darker colour down each side of your nose to slim a wide nose or on the underneath the tip of your nose to shorten a long nose, go under your chin and along the underside of the jaw to camouflage a double chin and finally a sweep of the darker to the cleavage will create depth and emphasis. 
6. Now you have finished contouring go look at yourself in a different mirror and blend some more!

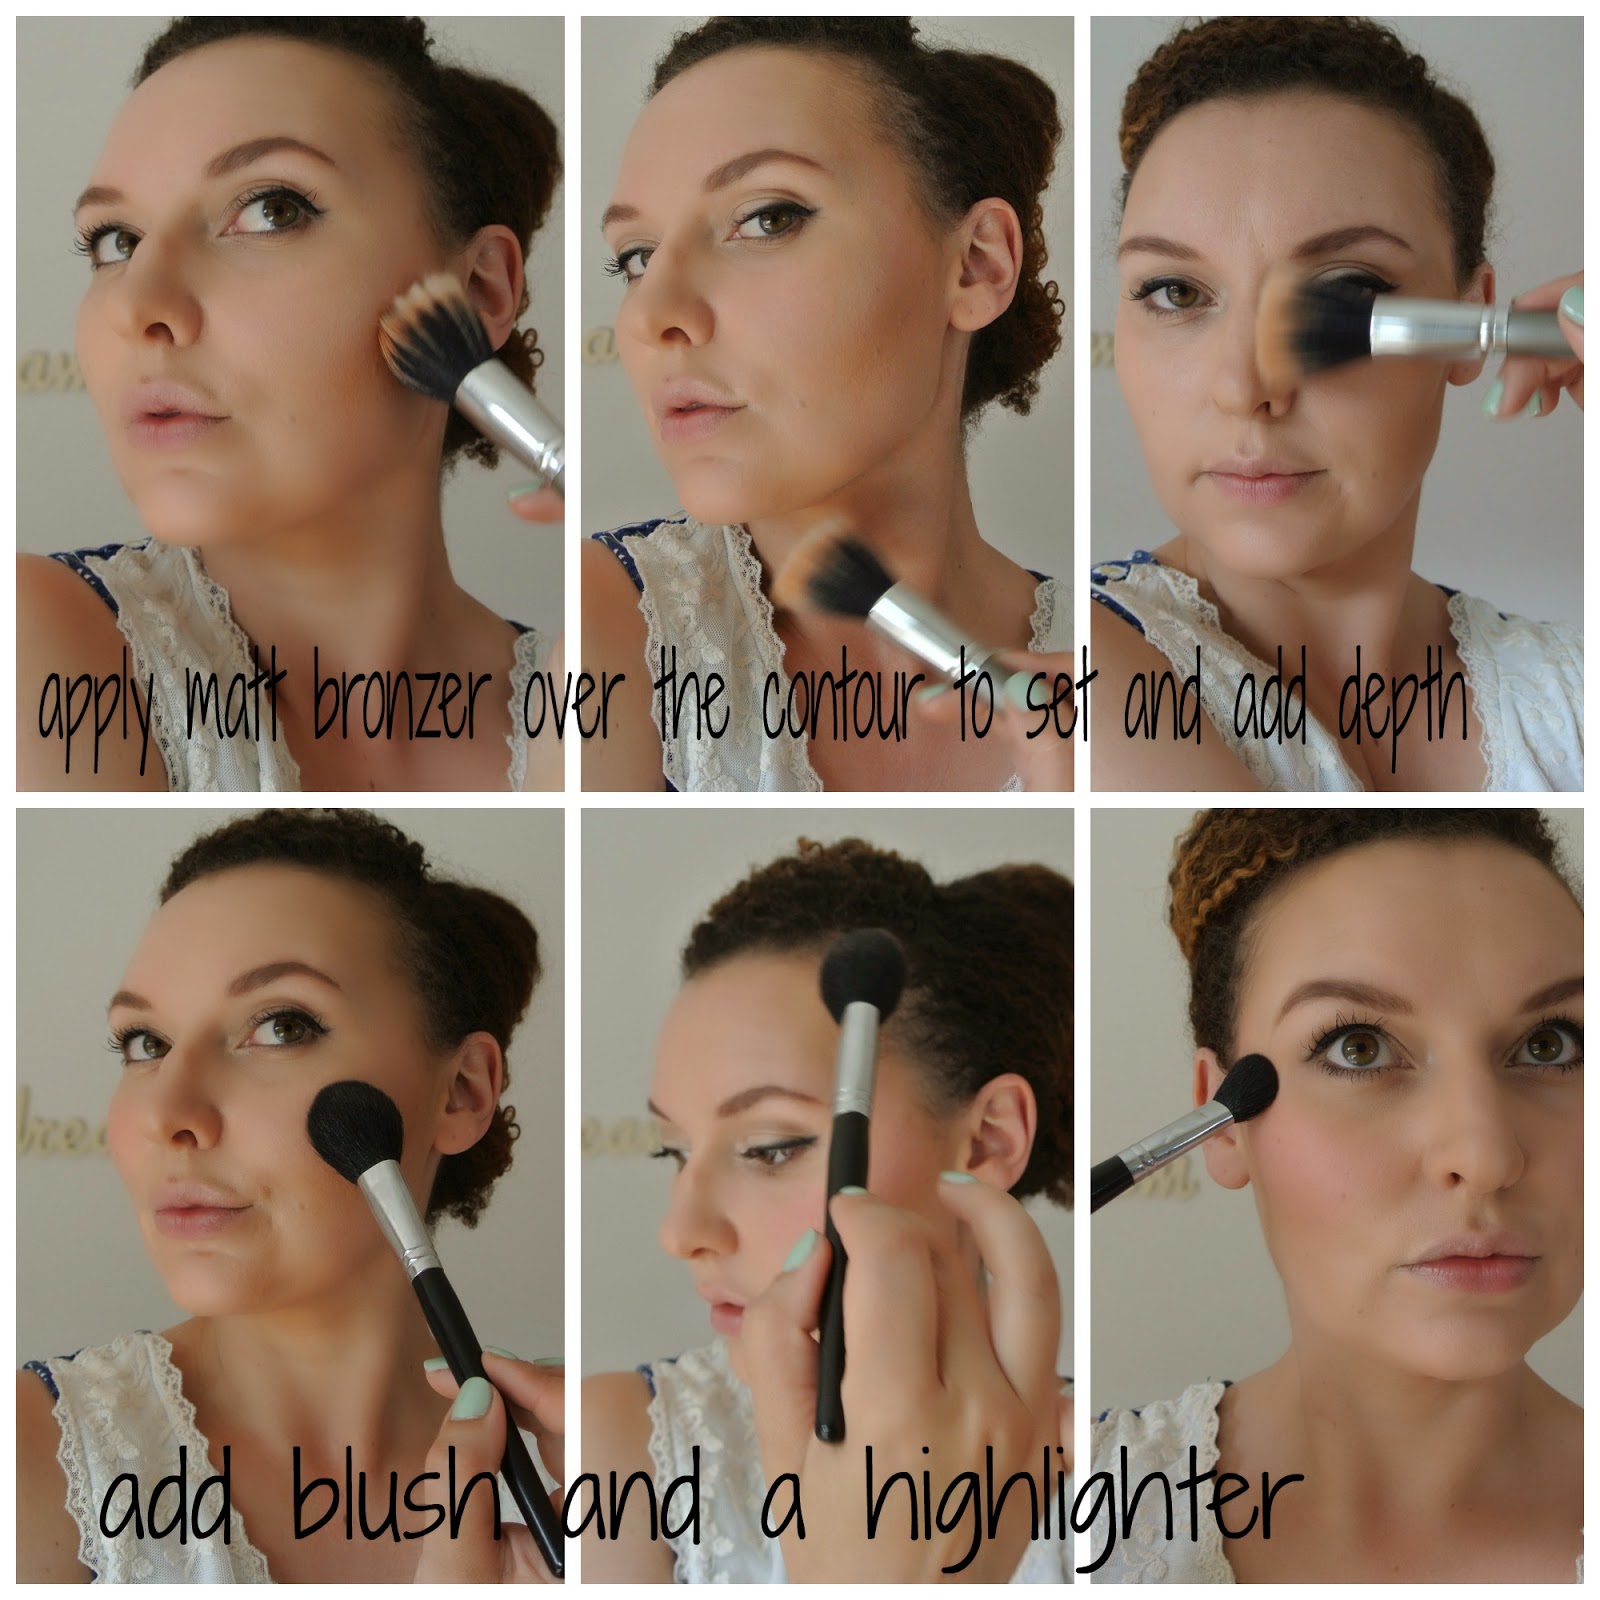
Just a note about products. Darker colour should be a Matt finish so it is flat and not reflecting the light  best products to use are either a bronzer without shimmer try Benefit Hoola or a face powder two tones darker than your skin tone. If you are using foundation to contour make sure you use your actual skin tone to blend the two contouring products.  

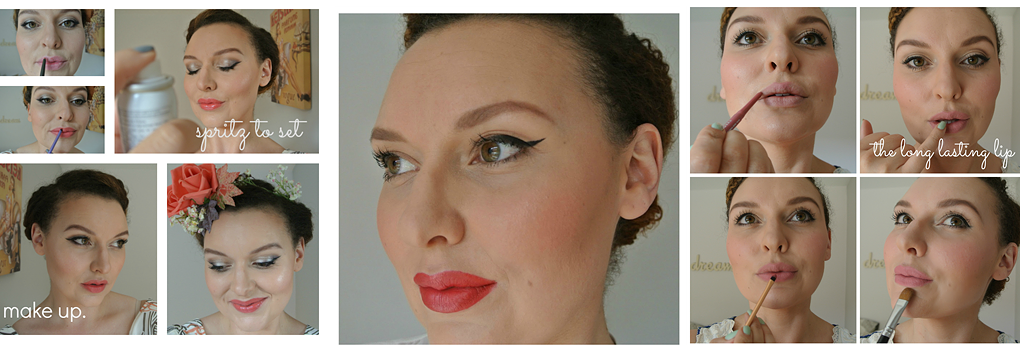
To finish the process you must add the light.  To highlight feel free to add shimmer but it also doesn't  have to be shimmery it could be a lighter concealer you use or a light reflecting concealer.  Good areas to highlight with shimmer are inner corner of the eyes, cuspids bow, tops of cheekbones, brow bones but to add a sweep down the centre of the nose and highlight the centre of forehead I prefer to stick to none shimmer.    For a contemporary look forgo the blush but if you can't resist finish with a sweep of blush on those cheeks and up to the temples.

Practise makes perfect when it comes to contouring and it's worth the effort. My original celeb reference point was Jennifer Lopez when I wrote this post first time round but I'd say she's been superseded! Here's some contour queens let's see if they can motivate you to join the contouring revolution!


Ax


Wednesday, 2 July 2014

How to Contour & Highlight

Ladies as requested here is my quick take on contour and highlight.  My version is not complicated and doesn't include layer upon layer of product.  I use a foundation stick to ensure enough coverage but if you want more you could do this over a coat of foundation (for example something light like MAC Face & Body).  Pop to the end of this post to purchase the products you might need for this look.

You need two colours of foundation a darker colour (one or two shades darker than your skin tone) this is your contour.  The darker colour is put in the areas of the face we’d like to ‘push back’ so under the cheekbones, under the jawline, down the sides and under tip of the nose and on the outer corners of the forehead.

You also need a lighter colour (one or two shades lighter than your skin tone) this is your highlight.   The lighter colour works by bringing forward the areas you are highlighting so above the cheekbones, down the centre of the nose and the centre of the forehead.


I'm using the Maybelline stick foundations in Soft Honey & Classic ivory.  I like a stick foundation as they make the task of contouring quite easy.  Prepare to look a bit odd in between blending!


Now you are ready to blend blend blend! You are going to blend these two colours so you have no lines left starting by blending the darker colours first using a buffing brush (I like the Real Techniques brushes check out my post of the tools you need here) in small circular motions I always start at the hollow of my cheekbone.  


Next you want to blend out the highlight you can use the same brush but you may need a smaller brush for the nose the aim is to blend not so that both colours are merged into one but so there are no harsh edges.


The next step is to  follow up this process with two powders to further enhance the contour and set the make up.  I used a pressed powder over the highlighted areas and a matt bronzer over the contour.   It's not necessary to add blush but I feel naked without it so I always add a sweep of blusher between the contour and highlight on the cheekbone,  add a touch up on the temples and in the summer a touch over my nose.  I go on and conceal under the eyes and any areas that need a bit of extra coverage.  


You can then add extra highlight if you so desire with an an illuminating highlighter such as MAC soft and gentle (which I am using here) or the old faithful touch éclat.  Places I recommend doing this is top of cheekbones, inner corner of eyes, cupids bow, brow bone.  This is one of my tricks to look awake even though I may be really tired!


PS pouting in the mirror while doing all of the above is totally optional but makes the whole process way more fun!

Hope this helps you ladies in the quest to a contoured face let me know how you get on.  Now there's a new term on the street which is 'Strobing" basically you can already do this if you mastered the two step process of contour & highlight.  How to strobe: omit or downplay the contour and ramp up that highlight baby!!!