So in the last lesson we touched on each of the three main eye make up types and the anatomy of the eye (here) if you need to reference back to the diagram at any point. The most requested eye make up by far is the smokey eye. This is a wearable reasonably subtle smokey eye I have chosen plum and gold as my two colours. ~Note smokey eye is technique not colour so it can be very natural to very dramatic.

Next we add a colour base so choose something that will work with the colours you have chosen this is Maybelline Colour Tattoo in Metallic Pomegranate this is your secret weapon in doing a successful smokey eye. Blend the colour base all over the eye but not too far up you don't want to go too far over the crease. These little pots make the smokey eye more intense and there's loads of them out their regardless of the brand they all do the same job: add depth of colour and give something for the eyeshadow to stick to. Follow the links to my favourites from Maybelline, MAC, Benefit and Smashbox.

Time to add your first eyeshadow colour I chose a matt texture plum shade and patted it all over the colour base keeping below the crease and then lightly added the same colour to the lower lash line (just with what was left on the brush not adding any further product). You can keep adding the first colour until you get the intensity you want. Don't worry about neatness at this stage as you will be blending more and cleaning up under the eye.

In we go with colour 2 I have chosen half baked from the naked palette as I wanted to warm up the colour and graduate upwards towards my brow bone. I push the colour right into the crease at the outer corner and blend forward and backward over the crease (windscreen wiper) and also do tiny circular motions with the brush in the same back and forth motions. If you are adding more product be sure to push the colour into the crease at the outer corner and work in towards the inner crease this way the majority of product in deposited on the outer corner.

I also intensify the darker colour on the lower lashline (usually about 2 thirds of the way across) and then add the lighter colour to the tear duct and across to meet the darker colour. I also highlight my browbone either with the light colour or a matt bone shade shadow. I will come back to eyeshadow textures in a later lesson.

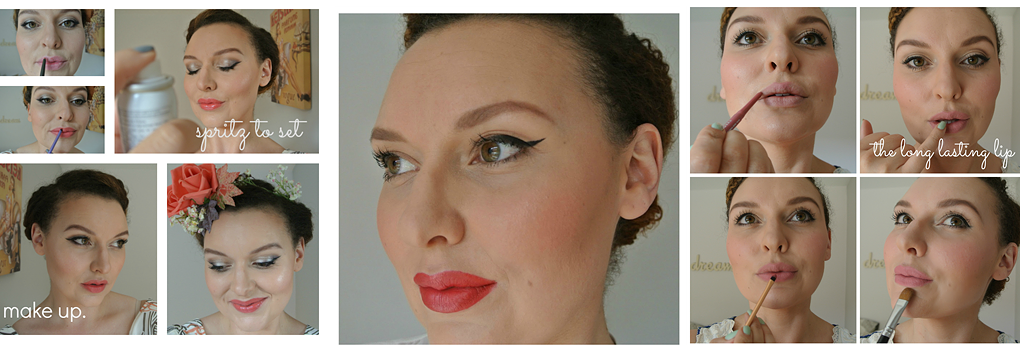
Curl your lashes and add mascara and a liner if you want to. Now is a good time to stand back and re-assess. You can go back in and add more if you want as maybe your blending came too far down and you need to pat more colour 1 over the shadows to intensify it or maybe you need to even out the shape on top by bringing your browbone highlight down slightly. Maybe you just need to blend more. Blend blend blend it will only make it look better.

Once you are happy with your eye make up clean up all the mess under the eye with a babywipe or gentle eyemake up remover, add the rest of your face and off you go. As Kirsty and I were off out on a MOL date last night I decided to add a little extra drama with a darker brown shadow through the crease (MAC's cork) and a set of half lashes. That's the beauty of a smokey eye once you master the technique you can make it as dramatic or as natural as you like.
I hope this has helped you master the smokey eye if you have any questions please leave a comment below or straight to the Facebook page and I'll do my best to answer your query x
{More on how to do your own make up...}
The Make up brushes you NEED
Using your fingers to apply your make up
Intro to doing your eye make up and why I do eyes first.
Using your fingers to apply your make up
Intro to doing your eye make up and why I do eyes first.
or if you are Melbourne based and would like to book and one on one lesson or special occasion make over read more about my make up services here.