Adore Beauty Pty Ltd

Wednesday, 28 May 2014

How to do winged eyeliner ~ gel liner.

Winged eyeliner...it's one of those things that can be soo right but can go soo wrong, it could easily make you late for work or a night out you could literally spend a good half hour trying to 'even' those flicks out.  Let me tell you now the face is not symmetrical so trust me if you are trying to get those flicks perfectly symmetrical you should just give up now! 

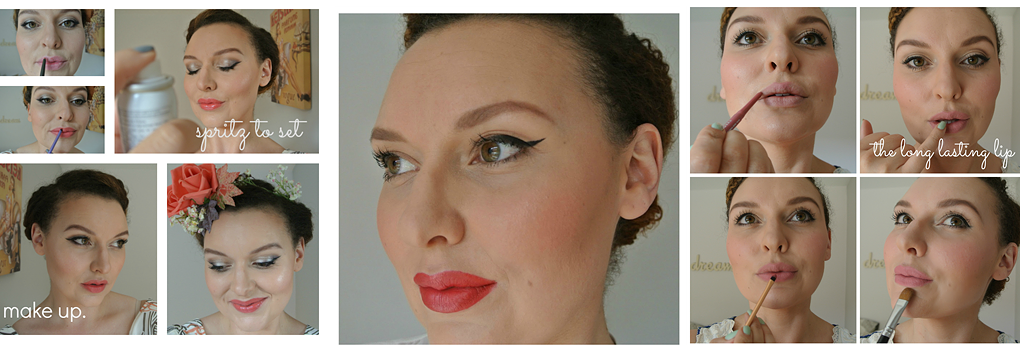
Here's my 'how to' for an easy winged out look there's special 'item' that makes this so super easy but I'm not going to mention it yet you will need to read on to find out.  I've paired mine with a classic red lip, fail safe classic look...I love it.  My liner of choice for this technique is L'oreal gel intenza.


Firstly as this is a look that is pretty light on the eyeshadow (therefore minimal fall out) I have gone ahead and done my  base first (I used L'Oreal True Match applied in a buffing motion with my Real Techniques Contour Brush).  Don't bother with under eye concealer just yet.  So first up you want to prep the eye you can use a primer or just run your foundation brush over your eyelids followed by a sweep of your powder.  Add a contour colour into the socket of your eyelid, use a taupe or light greyish shadow into the crease, this adds depth to your eye and is a nice frame for your liner.  If you are using a particularly wet liner this can also help stop the liner transferring onto your lid. 


So what's going to make this look so easy for you! Fanfare please....sellotape! It's going to keep the flick nice and clean and sharp.  Take two short strips and stick it to the back of your hand a few times.  Stick the tape at an angle that follows your lower lash line upward towards the tail of your brow.  Once you are used to doing liner you will be able to do it freehand and this would be the imaginary line you would be drawing.


With your gel liner dip a fine liner brush into the pot and go ahead and draw your wing it doesn't matter too much if you are a bit messy and go over the tape but you do need to keep it tidy on the inner edge.  Once you've done the wing use your long edge of the brush to line the lash line.  How thin you go depends on your eye shape I generally keep it quite thin and leave the inner corner liner free this gives the eye an open look.  If I wanted something more feline I would go ahead and line right into the tear duct. Then go ahead and lift your eyelid up gently and coat the underneath of the top lashline.  This keeps it all nice and black with no skin peeking through. Pull the tape off from the bottom inner corner upwards and outwards towards the brow. 


So you have your liner!   Now for a few finishing touches.  I always 'set' my liner by pushing a matt black shadow over the the gel liner using an angled brush. It keeps it in place and adds to the intensity.  If you want to to can also connect the wing on the lower lash line.  To do this you would use the same black eyeshadow and push it from the wing close to the lower lashes (you can chose how far along you'd like this to go)  Next, apply your concealer (if you do this step first the tape will take the concealer with it) add mascara upper and lower, an extra sweep of blush and you and your reasonably perfect liner are out of here!


Let me know if this works for you ladies! Comment and tell me what eye makeup technique  you would like next x
{More on how to do your own make up...}


or if you are Melbourne based and would like to book and one on one lesson or special occasion make over read more about my make up services here

{You can buy all the products I used here}
*contains affiliate links*
L'oreal gel intenza
Real Techniques Core Collection
Real Techniques Starter Brushes
Napoleon Colour Disc (Trench Coat)
Fine Liner Brush 


Wednesday, 21 May 2014

How to cope with nerves...

Being nervous about a big event in your life is natural whether it's your wedding, a big life change or an important project at work.  Nerves are usually part in parcel of the process. On the run up to my wedding I was definitely nervous or at least 'on alert' I would wake up in the middle of the night thinking about all sorts of possible outcomes, the good and the bad.  In fact when ever something 'big' is going in for me it's my sleep that suffers.  
Here's a few tips that I find help me:

Image Source
Positive Visualisation- on the run up to the wedding I thought about it a lot I wasn't just nervous about it I was also excited.  I was most worried about walking down the aisle all my friends and family turning round and all eyes on me.  That's approximately 200+ eyes when you break it down...no pressure!  When I was having a 'moment' which for me was usually in the middle of the night I would spend some time making myself visualise the walk down the aisle and seeing it happen and be a success.  I made it vivid and real in my head, it was a full colour movie of me in my dress, arm in arm with my dad, I could hear my entrance song (Damien Rice's Hornblowers Daughter, if you're interested) I could see the happy faces of each person as I walked past each row, I could feel the happiness and I could see the smile on my fiances face when I got to him at the end.  For me it really worked.  I figured if I was spending the time and energy on thinking anyway I may as well make it positive thoughts.  Sometimes I even used it as a way to get to sleep at night. You really can't under estimate positive thinking it really works.  When you feel the negative ones creeping in stop take a breath and work on making them positive.

Notepad and Pen- why is it when the lights are off and all is quiet your brain gets a supercharge of thoughts and the little niggly things pop right into your grey matter and they shine so bright you just lie there mulling it all over in your head?? It's an oldie but a goodie keeping a notepad and pen next to the bed is a good idea.  Jot down those thoughts and release them from the confines of your poor brain.  Take the paper option though as picking up your phone or iPad to write a note is probably going to wake you up more. Especially if you've got Facebook notifications,  15 new emails and a couple of what's apps requiring attention.  The act of scribbling down your thoughts is cathartic which then hopefully means you can get some shut eye.

Smiling Mind App- hard time shutting off? I like to use this guided meditation to help me clear my mind. Keep your headphones next to the bed and pop it on when you really need some help quieting your thoughts.  I like the 5 minute bodyscan and although meditation is not meant to be about sleep I do find it a good tool to actively focus on my body so my brain is way too busy to have all the other thoughts.  It can take practice but is handy to have and you could even do it on the train to work or at lunchtime in your car.

Image Source

Lavender pillow spray- I love a spritz of the L'Occitane Lavendar pillow spray or make your own Linen Spray there a great how to over on the 'One Good Thing' blog.  I just love the scent it seems to have an instant calming effect and when I pair it with one of the other methods here it usually helps me on my way.


Getting up for a while to take my mind of it- if all of the above doesn't work I usually get up for a while and do something else...read my book, do some pinning on Pinterest, once I feel I might have satisfied the itch I head back to bed and hope for the best! Try to keep it to about an hour maximum tell yourself 'back to bed by 5am' otherwise you will end up a very tired person if your body clock resets itself to 4am.  

Voice it- during the waking hours try to talk about what's going on in your head with your partner or loved ones. The act of saying something out loud alone can sometimes make you feel so much better. It may be something that seems massive in your head but as soon as you say it out loud it might just not seem as bad.  Whatever's going on for you it's very unlikely that you have to deal with it alone. Get talking and don't forget things that cause a magnitude of worry in the middle of the night are usually much more of a minor problem in the morning. 


Whatever's going on for you I hope you find these tips helpful.  Even if you're  getting your full 8 hours of beauty sleep a night I'm sure there's plenty of opportunity to actively make more positive thoughts in your life or to take out 5 minutes of your day for some recharging and refocusing and most of all some well deserved shut eye!

Thursday, 15 May 2014

How to do your own make up~ Smokey Eyes


So in the last  lesson we touched on each of the three main eye make up types and the anatomy of the eye (here) if you need to reference back to the diagram at any point.  The most requested eye make up by far is the smokey eye.  This is a wearable reasonably subtle smokey eye I have chosen plum and gold as my two colours. ~Note smokey eye is technique not colour so it can be very natural to very dramatic.


First up we need to prep the mobile lid which means add a primer I'm using a MAC Paint Pot in 'Painterly' or you could use a dab of concealer or foundation blended well over the lid this is what give your eye make up staying power and stops creasing, a sweep of face powder over that will aid blending and make it even better in stopping creases.

Next we add a colour base so choose something that will work with the colours you have chosen this is Maybelline Colour Tattoo in Metallic Pomegranate this is your secret weapon in doing a successful smokey eye.  Blend the colour base all over the eye but not too far up you don't want to go too far over the crease.  These little pots make the smokey eye more intense and there's loads of them out their regardless of the brand they all do the same job: add depth of colour and give something for the eyeshadow to stick to. Follow the links to my favourites from MaybellineMACBenefit and Smashbox.


Time to add your first eyeshadow colour I chose a matt texture plum shade and patted it all over the colour base keeping below the crease and then lightly added the same colour to the lower lash line (just with what was left on the brush not adding any further product).  You can keep adding the first colour until you get the intensity you want.  Don't worry about neatness at this stage as you will be blending more and cleaning up under the eye.


In we go with colour 2 I have chosen half baked from the naked palette as I wanted to warm up the colour and graduate upwards towards my brow bone.  I push the colour right into the crease at the outer corner and blend forward and backward over the crease (windscreen wiper) and also do tiny circular motions with the brush in the same back and forth motions.  If you are adding more product be sure to push the colour into the crease at the outer corner and work in towards the inner crease this way the majority of product in deposited on the outer corner.


TOP TIP:  I like to add an 'anchor' to my eye make up it is either the bronzer I will be using later on or the face powder I will use for contouring or sometimes even the blush I plan on using.  I like to sweep a little bit of that over colour 2 through the crease in the same motion but ever so lightly.  I just feel this 'anchors' the other colours and ties it into the rest of my face.  

I also intensify the darker colour on the lower lashline (usually about 2 thirds of the way across) and then add the lighter colour to the tear duct and across to meet the darker colour.  I also highlight my browbone either with the light colour or a matt bone shade shadow.  I will come back to eyeshadow textures in a later lesson.  


Curl your lashes and add mascara and a liner if you want to.  Now is a good time to stand back and re-assess.  You can go back in and add more if you want as maybe your blending came too far down and you need to pat more colour 1 over the shadows to intensify it or maybe you need to even out the shape on top by bringing your browbone highlight down slightly.  Maybe you just need to blend more.  Blend blend blend it will only make it look better.


Once you are happy with your eye make up clean up all the mess under the eye with a babywipe or gentle eyemake up remover, add the rest of your face and off you go.  As Kirsty and I were off out on a MOL date last night I decided to add a little extra drama with a darker brown shadow through the crease (MAC's cork) and a set of half lashes. That's the beauty of a smokey eye once you master the technique you can make it as dramatic or as natural as you like.


I hope this has helped you master the smokey eye if you have any questions please leave a comment below or straight to the Facebook page and I'll do my best to answer your query x


{More on how to do your own make up...}


or if you are Melbourne based and would like to book and one on one lesson or special occasion make over read more about my make up services here


Wednesday, 7 May 2014

Intro to doing your eye make up and why I do eyes first.

If you have ever had your make up done by me you know I do eyes first.  I usually a warn my clients this is how I do it but if I don't I usually hear a paniced voice asking "Am I getting foundation??" The cleanest way of doing make up up is by doing your eyes first that way if there is fallout (i.e. eyeshadow dropping down on to your face) the rest of your face can be cleaned up easily and not have eye make up smeared all over your base. It may look weird when you are doing it but it just saves time and makes for a cleaner therefore better finish.    One thing I will say is if you are using all natural colours (so nothing too dark and smokey) or even using cream eyeshadow products (that don't have fall out) you should be fine to do our base first.  I would still leave under eye concealer to the very end so you can still do a bit of a clean up.  So lets get down to it...


{the eye anatomy}

If you are going to following any of my how to's (or anyone else's for that matter) you need to 'get' the anatomy of the eye (so you know where you are putting what). 


The brow bone is the highest part of your eye directly under your eyebrow this is a great place to use a highlighter which makes the arch of your brow more defined which helps to frame your face.

The socket or crease is the line where your eyelid folds over your eyeball some people don't have much of a crease at all and this is a flat area, some people have hooded eyes so the crease folds away into nothingness and some people have a natural enviable crease that gives them an effortless chicness when they work it right... think Audrey Hepburn.


The outer corner or outer V is literally horizontal V shape at the end of your lashline into the start of your socket line this is where you put your outer corner definition when doing a classic eye.


The mobile lid is the part of your eye that moves when you blink i.e. your eyelid.  This is likely where you usually put most of your eye shadow at the moment then wonder why you can't see it when you open your eyes.


The lashline.  We have two upper and lower.


The inner Corner/tear duct is the smaller horizontal V shape pointing in towards the eye. Great for adding highlight to make you look more awake or make close set eyes look wider apart.


*Thanks to my beautiful model Brogan *
  
{the three main 3 looks}

The thing I get asked most is how to do eyes or people tell me they just can't do eyes.  In all honesty I think eye make up is probably easier than doing a lot of other things in make up for example expert contouring or a really defined bright lip. In my opinion there's a 3 main kinds of eye make up techniques and I have put together some Pinterest boards for you to follow which better displays them.  


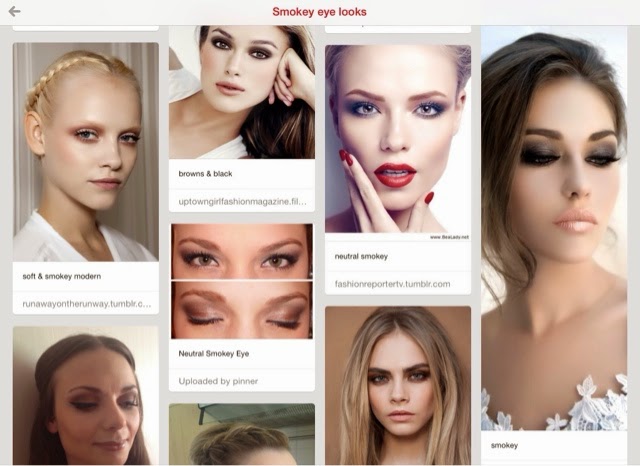
Smokey Eye: this is probably the most mistaken eye makeup some people think this is a colour as opposed to a technique a smokey eye can come in any colour and it's basically using two colours that graduate upwards toward the brow.   Possibly the easiest eye make up to master (honest!) provided you can blend or have a lovely brush to assist you in the process.


 Have a look at the smokey eye looks here .

Classic Eye: this is a eye technique with one main colour all over the eye that then has outer corner definition in a darker colour, this is the eyemake up look I think most people are aiming for when they ask for a smokey eye.  Great for a feline eyeshape and acccessoried beautifully with a elongated flick of liner. 


Check out my classic eye examples here.

Socketline/Crease: think old hollywood eyes.  Here the eye crease is defined in a darker colour which adds depth to the eyes and usually suits a rounder doe eye type look and tyically paired with a thick statement liner and lashes. 


Research the socketline look here.

~edit.  Since I wrote this post there has been a few popular additions in make up namely halo eyes & cut crease I like them both but both are slightly trickier to do on yourself but I will hopefully come back to add these as how to's soon.  If you really want to see them give me a yell on the comments below.


{More on how to do your own make up...}


or if you are Melbourne based and would like to book and one on one lesson or special occasion make over read more about my make up services here