Wednesday, 23 July 2014
How to do brows...
Here's a quick little something on how to do brows:
1. Brush those babies up with a spoolie (or clean mascara wand)
2. Fill in with a shadow starting from the arch in an outwards direction (I like to use an angled brush)
3. Work your way down the tail of the brow elongating them if you so desire
4. Brush the product lightly through the start of the brow so to keep it natural (an upwards direction is good here)
5. Want to look five years younger? Highlight on top of your brow and blend it in which give you an instant eye lift..perfecto x
Do you have brow traumas? Ask me a question and I'll do my best to answer catch me on...
facebook | pinterest | instagram | twitter
...ohh and excuse my fluffy hair #curlygirlproblems
Monday, 21 July 2014
How to do your own wedding make up...polished & natural.
This is the first of a series in how to do your own wedding make up that I have had featured over on the fabulous Scottish wedding blog Braw Brides it's really important you pop over there for a full description of each step as this is just a quick how to in pictures....easy! Don't forget you can ask any questions or if you have any requests on catch me on social media x
Friday, 18 July 2014
Natural skincare- Oat Bomb and Oat Milk Toner
My little boy Ollie has eczema it's horrendous for him he's a very itchy boy we are currently on a on a journey to relieve his symptoms in a natural way. The harsh steroid creams I have been using for the past four years have been shelved and with the help of a herbalist we're now on a natural skincare journey with him. Thanks to our lovely herbalist Clare at Napiers who introduced me to the power of the humble oat! I started off just using this on Ollie but I realised how lovely it made my skin feel and now it's a fixture in my own skincare routine. So much so I've stopped using any other day moisturiser (apart from my eye cream) and I no longer have the flakey skin problem I did have with the transition from winter to spring.
Follow the steps below to create your own natural Oat Bomb and Oat milk toner.
I'm about to go all Blue Peter...
1. Oats
2. A muslin cloth (or you could use a pair of tights)
3. String
4. Something to decant into (for the toner)
5. Coconut oil (optional)
Wrap up a couple of handfuls of oats in a muslin cloth and tie firmly with string. This is your oat bomb. Run your bath and allow the water to run through the muslin and oats so the water is turned into a natural oatmilk. For additional moistursing and lovely scent add a spoonful of coconut oil to your warm bath. Lie back and wallow in it!
Follow the steps below to create your own natural Oat Bomb and Oat milk toner.
I'm about to go all Blue Peter...
Here's what you need:
1. Oats
2. A muslin cloth (or you could use a pair of tights)
3. String
4. Something to decant into (for the toner)
5. Coconut oil (optional)
Wrap up a couple of handfuls of oats in a muslin cloth and tie firmly with string. This is your oat bomb. Run your bath and allow the water to run through the muslin and oats so the water is turned into a natural oatmilk. For additional moistursing and lovely scent add a spoonful of coconut oil to your warm bath. Lie back and wallow in it!
For the toner: Squeeze some additional water out of the oat bomb into a bowl and later decant into a dropper bottle or recycled pump bottle. Keep this in the fridge and give it a good shake before each use. You can also use the soaked oat bomb as an exfoliator all over your body in the bath.
I have been using my decanted oat milk daily. You can use it as a cleanser itself but most of all I like keeping my container in the fridge and using it as a toner on my skin. It feels cool and has a slight tightening effect which makes my skin look and feel toned but not in an uncomfortable way. I still follow my usual evening skincare routine since starting this natural approach I honestly have not used a moisturiser in the mornings and have really noticed a radiance in my skin. So for as long as it works for me (as I am a believer of changing up your skincare routine) I would highly recommend adding a bag of oats to your shopping list. For Ollie we are still on his journey some days are better than others but I know oats will always be useful for calming itching & irritated skin the anti-inflammatory, moisturising & cleansing properties of oats have astounded me I would recommend you try for yourself!
Ax
Ax
Wednesday, 16 July 2014
How to do your own Wedding Make up- Natural and Polished.
Braw Brides have invited me to give you the low down on creating the perfect make up look for you on your wedding day. Wedding day budgets can be tight and if a professional make up artist is not an option for you or perhaps you are having a destination wedding and choosing to do you your own make up I hope to give you a few hints and tips to make the task a bit easier and enjoyable. I will be bringing you three looks in this series the first is my most requested look which is 'Polished and Natural'.
You want to you look like you on your big day but you would like to look like the most beautiful version of yourself that translates well in your wedding photos and that you can look back on and say "wow I really loved the way I looked on my wedding day".
So here we go I will recommend products as I go...this first step may suprise you but I reccomend you do your eyes first this means if you drop any make up on your face it can be easily cleaned off and your base will be nice and clean underneath. Firstly you want to prep your eyelids to make sure the make up lasts you really don't want a big crease in your eyelid with this look. I used the MAC paint pot in Soft Ochre. You can use a cream shadow or even your concealer lightly over your lids this cancels out any colour and gives a good base. I'm using the Urban Decay Naked Palette 2 but you could use any shades you have as long as one is light and one is darker. Sweep your light shade right over the lid into the inner corner and over the brow bone. I have chosen 'Bootycall' as it has a little bit of shimmer through it but this is also a lovely look with all matt shadows.
Now time to find your crease-think about the brush size you are using...If you have small eyes you will need a small brush go for a tapered brush if you can this is the MAC 217. Dip your brush directly into the darker shadow (I'm using Tease) so you just have the product right on the tip of the brush, lean your head back and look into the mirror, put your brush into the outer corner end of your crease (not right into the outer corner of your lashline check back on my eye anatomy pic here) then do a little curved wind screen wiper motion with your brush. As well as back and forth do tiny little circles with the brush in the same wiper motion. Go lightly to start out then you can add more shadow if you want a bit more depth. Don't go too far in on each side there should be a gap between the end of your crease and the start of your lash line as this is what keeps your eye looking wide awake and open. You could also use a smaller brush with an even darker shadow if you want it more precise. Then, as always, keep on blending in the same motion until you are happy with it.
This look generally needs some lashline definition to make it really work. You can either do that with a matt black shadow on an angled brush to really push and smudge into the lashline or go for a full on gel liner (i'm using MAC Blacktrack) but the L'oreal and Maybelline Gel liner is also good. For a really precise winged liner to finish this look off follow the steps detailed in my winged liner lesson here. I also like to add a kohl liner to the upper water line (this is underneath your lashline) as it's keeps everything nice and dark and defined...this may take practice! Add lashings of mascara to curled lashes and you are good to go.
Ax
Friday, 11 July 2014
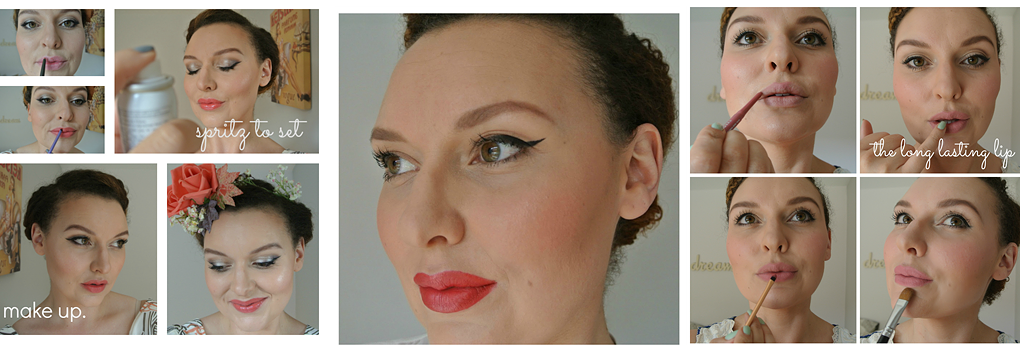
Quick 5 min lesson for Long Lasting lips!
When the weather is warming up and the sun is shining I generally go for a lighter make up look but do like to make my lips a feature. How do I keep my lipstick long lasting? Follow this quick tutorial for a long lasting lip...
- I have already prepped my lips with a lip balm as described in my skincare lesson
- I like to start with a base so usually blot my foundation brush over my lips to neutralize my lip colour (this is a good step if you have quite pigmented lips) it only needs the tiniest amount of product to do this I am not advocating concealer lips this also gives a bit of staying power
- I start by outlining my lips then filling in all over with the same lip pencil then patting the colour in with a finger this gives the lipstick or gloss you are using something to stick on to
- I then really pack my lip brush with the lip stick of my choice and work it into the lips all over, back and forth, this (along with the liner) creates a stain on your lips
- If your lips need a little bit of correction (for example you might want to slightly enhance your top lip or you might need to even out your lip line) go back in and do this with your same lip liner
- For a professional finish clean up around the edges using your concealer brush (again only a tiny bit of product required)
- You can then top up the lips with a little bit of lipgloss if you like a glossy look or if you want really long lasting blot by placing a tissue over your lips and pressing (not between the lips) and repeat application
- If you are into highlight (and you should be after my contour & highlight lesson) don't forget to add a dab of your highlighter to your cupids bow to give you an even poutier finish.
My favourite lip liners-
1. Rimmel Exaggerate in 063 Eastend Snob (a soft mauve toned pink good for teeth whitening!)
2. MAC Lip Pencil in Subculture or No 7 Precision Lips Pencil in Nude (the perfect nudes and a great choice for exaggerating your lipline in a natural way or for using as a base if you don't have a matching liner for your lips)
3.A Clinique chubby stick can be both your liner and lip colour....I prefer the intense range as these have the best colour payoff.
Have fun! x
Friday, 4 July 2014
Storyboard- Love's Young Dream
This is Love's Young Dream...you can almost feel the passion and touch the warmth between these two hearts. Even on your wedding day find the time to just be the two of you. Take a moment to feel the sun on your face, breath in the warm fresh air and look forward to the rest of your lives together.
Images by Lush & Co
Wednesday, 2 July 2014
How to Contour & Highlight
Ladies as requested here is my quick take on contour and highlight. My version is not complicated and doesn't include layer upon layer of product. I use a foundation stick to ensure enough coverage but if you want more you could do this over a coat of foundation (for example something light like MAC Face & Body). Pop to the end of this post to purchase the products you might need for this look.
You need two colours of foundation a darker colour (one or two shades darker than your skin tone) this is your contour. The darker colour is put in the areas of the face we’d like to ‘push back’ so under the cheekbones, under the jawline, down the sides and under tip of the nose and on the outer corners of the forehead.
You also need a lighter colour (one or two shades lighter than your skin tone) this is your highlight. The lighter colour works by bringing forward the areas you are highlighting so above the cheekbones, down the centre of the nose and the centre of the forehead.
I'm using the Maybelline stick foundations in Soft Honey & Classic ivory. I like a stick foundation as they make the task of contouring quite easy. Prepare to look a bit odd in between blending!
Now you are ready to blend blend blend! You are going to blend these two colours so you have no lines left starting by blending the darker colours first using a buffing brush (I like the Real Techniques brushes check out my post of the tools you need here) in small circular motions I always start at the hollow of my cheekbone.
Next you want to blend out the highlight you can use the same brush but you may need a smaller brush for the nose the aim is to blend not so that both colours are merged into one but so there are no harsh edges.
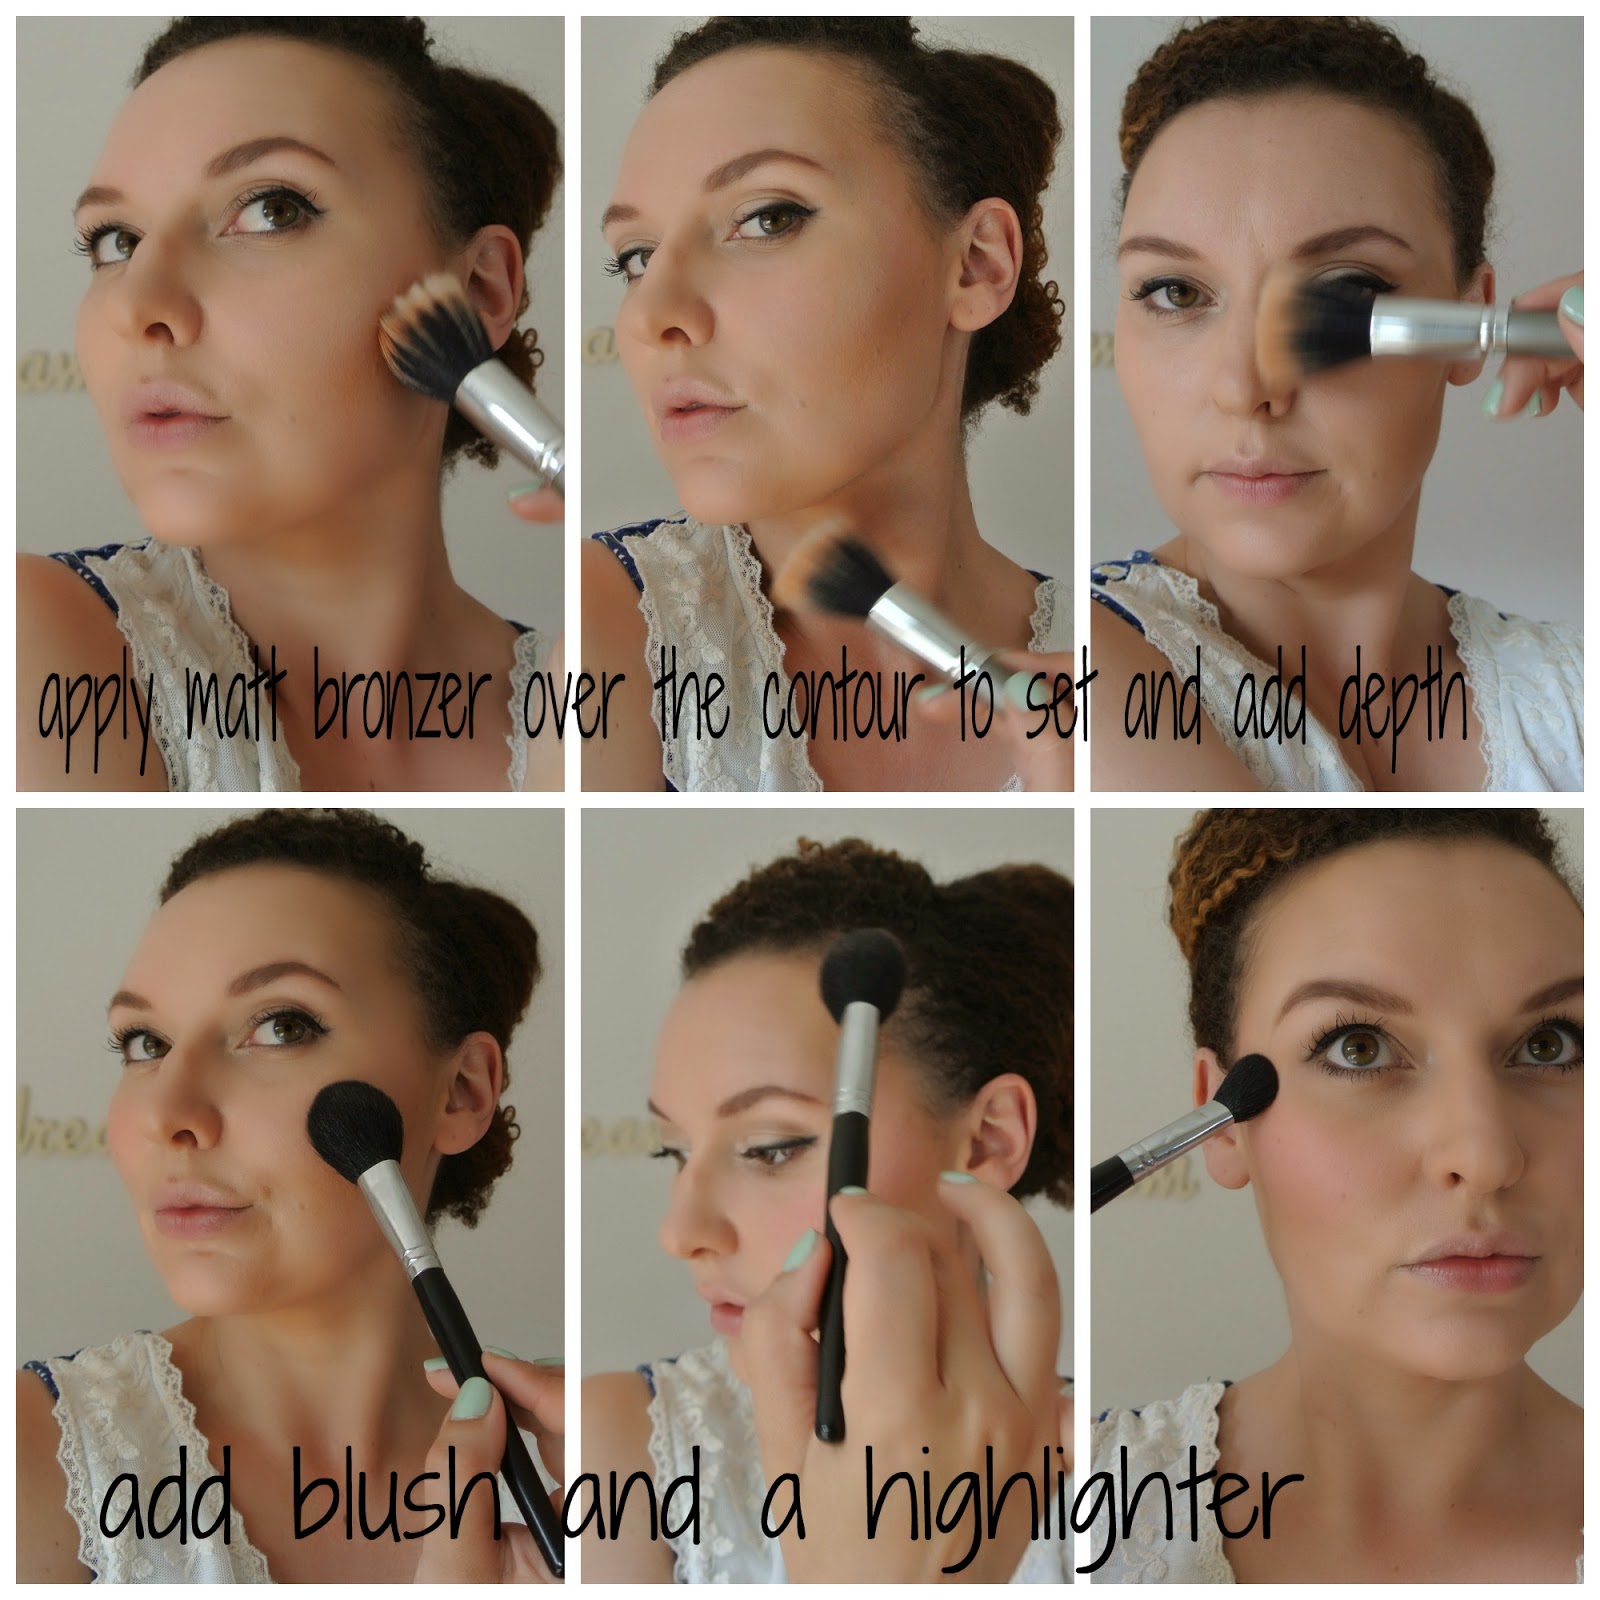
The next step is to follow up this process with two powders to further enhance the contour and set the make up. I used a pressed powder over the highlighted areas and a matt bronzer over the contour. It's not necessary to add blush but I feel naked without it so I always add a sweep of blusher between the contour and highlight on the cheekbone, add a touch up on the temples and in the summer a touch over my nose. I go on and conceal under the eyes and any areas that need a bit of extra coverage.
You can then add extra highlight if you so desire with an an illuminating highlighter such as MAC soft and gentle (which I am using here) or the old faithful touch éclat. Places I recommend doing this is top of cheekbones, inner corner of eyes, cupids bow, brow bone. This is one of my tricks to look awake even though I may be really tired!
PS pouting in the mirror while doing all of the above is totally optional but makes the whole process way more fun!
Hope this helps you ladies in the quest to a contoured face let me know how you get on. Now there's a new term on the street which is 'Strobing" basically you can already do this if you mastered the two step process of contour & highlight. How to strobe: omit or downplay the contour and ramp up that highlight baby!!!
{More on how to do your own make up...}
{shop the post}
*may contain affiliate links*


